This chapter explains how to use Console Manager to administer the nodes that it controls.
The main Console Manager GUI, described in Chapter 3 of this manual, also allows you to power down, power up, reset a node, generate a non-maskable interrupt (NMI), change the properties of a node, view system logs for a specific node in a site, or connect to, spy, or steal the system console for a specific node. This chapter describes how you can use the Console Manager GUI to perform these administrative actions.
This chapter contains the following sections:
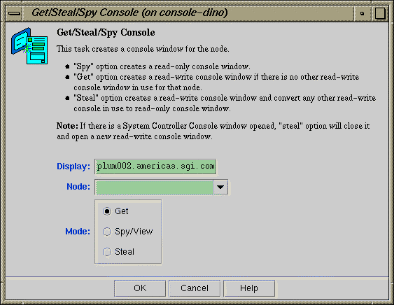
This task creates a console window for the node as follows:
The Get option creates a read-write console window if there is no other read-write console in use for that node.
The Steal option creates a read-write console window and converts any other read-write console in use to a read-only window.

Note: If there is a requirement to change the console type to satisfy the steal request on controllers that use only one serial line (the MMSC and L1 controllers, specifically), any read/write connections to the controller will be dropped instead of being converted to a read-only connection. The user having the read/write connection previously will not be warned or informed of the drop in console connectivity. Active read-only and console logging sessions continue to operate, but will monitor the connection as directed by the console type switch.
The operations that cause SGIconsole to operate in this manner are as follows:
Stealing a system console and the console type needs to be switched
Stealing a controller console and the console type needs to be switched
Starting a logging session on a system console and the console type needs to be switched
Starting a logging session on a controller console and the console type needs to be switched
The tasks that are affected are as follows:
Get/Steal/Spy Console
Connect to a Controller Console
Switch State of Console Logging
The Spy option creates a read-only console window.
From the Tasks pulldown menu, choose the following, as shown in Figure 3-3.
The Get/Steal/Spy Console dialog box appears, as shown in Figure 4-1.Node Tasks -> Get/Steal/Spy Console
In the Display field, type the name of you system where the console window should be displayed.
In the Node field, using the pull-down tab select the name of the server for which you want to get, steal, or spy the system console.
In the Mode field, select the Get, Spy, or Steal button.
Click the OK button.
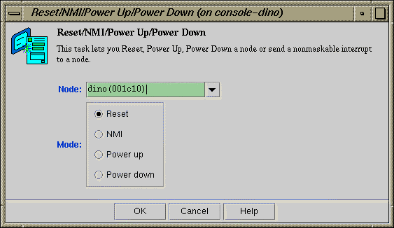
This task allows you to power down, power up, reset a node, or send a nonmaskable interrupt to a node.
To power down, power up, reset, or send a nonmaskable interrupt (NMI) to a node, follow these steps:
From the Tasks pulldown menu, choose the following:
The Reset/NMI/Power Up/Power Down dialog box appears, as shown in Figure 4-2.Node Tasks -> Reset/ NMI/ Power Up/ Power Down
From the Node field pulldown tab, select the node to which you want to perform the operation.
Click the button to the right of the Mode field you wish to perform.
Click the OK button.
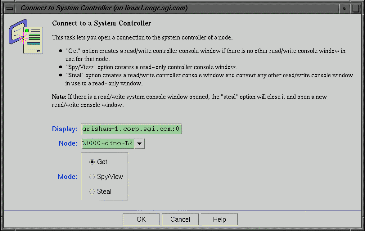
This task lets you open a connection to the system controller of a node as follows:
The Get option will succeed only if there are no other System Controllers or node Console windows open.
The Steal option creates a read-write console window and converts any other read-write console in use to a read-only window.
Note: If there is a requirement to change the console type to satisfy the steal request on controllers that use only one serial line (the MMSC and L1 controllers, specifically), any read/write connections to the controller will be dropped instead of being converted to a read-only connection. The user having the read/write connection previously will not be warned or informed of the drop in console connectivity.
This is the same as stealing standard console connections.
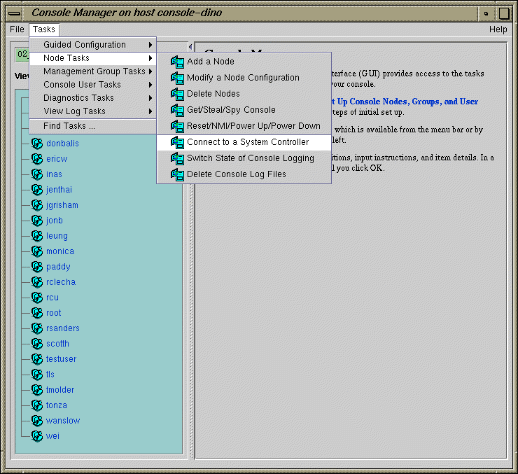
From the Tasks pulldown menu, choose the following, as shown in Figure 4-3.
Node Tasks -> Connect to a System Controller
The Connect to a System Controller dialog box appears, as shown in Figure 4-4.
In the Display field, type in your display hostname as follows:
hostname.mycompany.com:0
From the Node field pulldown tab, choose the name of the node for which you want the system controller.
In the Mode field click the Get or Steal button or the Spy/View button.
Click the OK button.
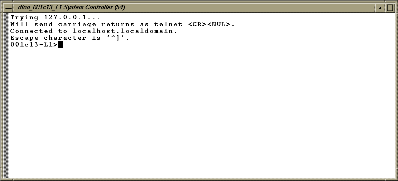
A System Controller Console appears, as shown in Figure 4-5.
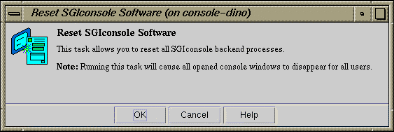
This tasks allows you to restart the Console Manager ( nexxus) daemon. Running this task will cause all opened console windows to disappear for all users. Restarting the Console Manager daemon is useful for resetting console and logging sessions that have malfunctioned and for when making new connections proves to be unreliable.
From the Tasks pulldown menu, choose the following, as shown in Figure 4-6.
Diagnostics Tasks -> Reset SGIconsole Software
The Reset SGIconsole Software dialog box appears, as shown in Figure 4-7.
Click the OK button.

To use ssh(1) to retrieve log information, you must perform the following procedure:
Install and run the sshd(8) daemon on the node from which system logs are to be obtained.
Use the ssh-keygen (1) command to set up RSA public and private encryption keys for the user account on the SGIconsole server and the root account of the node (server) containing the logs.
Exchange the public keys of both the node's user account as it appears in the User Name for Viewing Log field and the Console Manager user's account on the SGIconsole server by copying the contents of the .ssh/id_*.pub files into the .ssh/authorized_keys file of the accessing account, as follows:
sgicuser@sgiconsoleserver:.ssh/id_*.pub ---> nodeuser@nodename:.ssh/authorized_keys
nodeuser@nodename:.ssh/id_*.pub ---> sgicuser@sgiconsoleserver:.ssh/authorized_keys
where sgicuser is the user account on the SGIconsole server (the account which Console Manager has logged in with), and nodeuser is the user account assigned to the node in the User Name for Viewing Log field of the Modify a Node dialog box for that node. Usually, should be the username root.Note: This installation assumes the Version 2 protocol, where id_dsa.pub or is_rsa.pub are possible public key files for an account. If Version 1 protocol is used, the file may be named identity.pub instead. Log into the user's account on the SGIconsole server to ensure that the hostname of the node configured for SGIconsole is:
Recognised as a valid hostname as listed in the .ssh/known_hosts file
Allows the execution of the remote command echo hello as the user root without having to specify the password or the root account
Test the installation and operation of ssh(1), as follows:
% ssh -X -l root node echo hello
If there is any interruption to the ssh command such as input required from the terminal, the View System Log command fails and produces a dialogue box indicating that the login failed.
| Note: The same hostname provided for the node definition in SGIconsole must be used when specifying a host for ssh to log into. That is, the hostname recorded in the .ssh/known_hosts file for the SGIconsole user account and the hostname provided in the node's definition, must be the same. |
Once the ssh command is able to connect, without interruption to the required node as root from the specified SGIconsole user account, the View System Log command will operate properly in scmgr(1).
This task allows you to view system logs (syslog) of the servers and system controller logs of the servers.
To get the system log or system controller logs for a server, follow these steps:
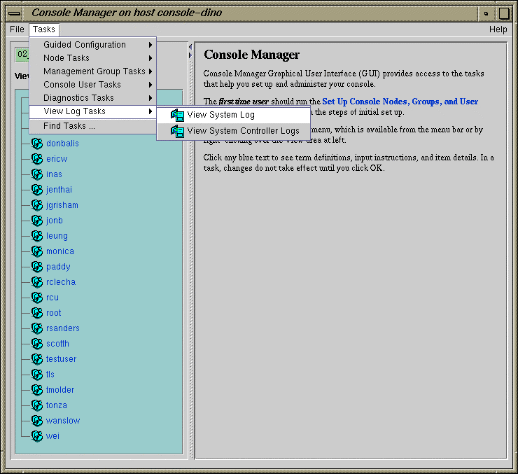
From the Tasks pulldown menu, choose View Log Tasks, as shown in Figure 4-8.
Choose View System Log or View System Controller Logs.
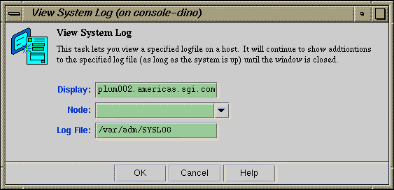
The View System Log Dialog Box (or View System Controller Logs Dialog Box) appears, as shown in Figure 4-9.
In the Display field, type in your display hostname as follows:
hostname.mycompany.com:0
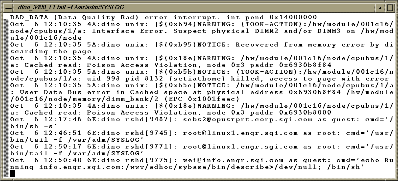
From the Node field pulldown tab, choose the name of the node for which you want the system log. The system log window appears, as shown in Figure 4-10.
Note: If the log screen does not appear, make sure that you enter your complete display name as shown in Procedure 4-6.
| Note: Console users can only get the logs of one system controller for any node at a time. |
| Note: For SGI Origin 2000 rackmount servers (servers that use the multimodule System Controller (MMSC)), the system controller logs from the Module System Controllers (MSCs) in rack 1 (both upper and lower bays) are displayed. |
This section describes how to use console logging.
Console logging is available to users of either the SGIconsole Console Manager graphical user interface, or the SGIconsole text-based user interface (tscm(1)). Regardless of which user interface is used, console logging works the same way for all users.
| Note: If the SGIconsole machine is rebooted or the SGI console Reset node task is run, console logging is disabled on all nodes. For information on how to automatically restart console logging, see “Restarting Console Logging After a System Reboot” in Appendix A. |
This section describes the following topics:
The access controls to allow or deny console logging initiation and termination are provided by the Console Manager GUI, under the tasks Add Management Group, Modify Management Group, and Delete Management Group. Use these tasks to deny or allow users to activate or deactivate console logging using the Switch State of Console Logging task. For more information, see “Access Controls in Console Manager” in Chapter 2.
Console logs are located on the web server for SGIconsole. To access console logs for nodes that have logging enabled, launch a web browser and use the URL as follows to list the nodes for which logs are available.:
http://sgiconsoleserver/SGIconsole-logs/ |
You can also view Console logs from the SGIconsole webpage using the View Console Log Files button.
| Note: Access control of the viewing log files mechanism is not supported, because the viewing is done through your web browser. |
In previous SGIconsole releases, the View Console Log utility used the rsh(1) command to collect and display a log file from an operating system running on a node. In the SGIconsole 2.0 release, the View Console Log uses the ssh(1) command instead.
The logs are stored in an organizational structure and contain the raw data from a read-only console session to a node as follows:
<node>/<node>-<year>-<mt>-<dt>-<hrmn>-(system|controller).txt
Use your web browser to read or download the log files. The timestamp on the file name of the log is the time that console logging started for that particular logging session. The system or controller keyword in the file name of the log indicates the Console type initiated for that logging session.
| Note: The logs may contain terminal maintenance data (control characters, escape sequences, and so on), recorded alongside human-readable text data as it has appeared in the output stream of the terminal. SGIconsole does not perform any filtering of console output data. |
Console logging is off by default. To turn Console logging on, follow the steps in the Switch State of Console Logging.
Console log rotation is automatically handled by SGIconsole. It is performed to maintain a level of free disk space on the SGIconsole server.
Logs are checked for rotation every 20 minutes, and are rotated when they exceed the size specified by the Open new file after size reaching setting in the Console Manager.
The oldest logs of all nodes are discarded when available disk space is inadequate. In order for this free-space-recovery process to operate successfully, logs need to be rotated so that log data does not appear in one file (per node) in the log repository. To ensure this happens, a Open new file after size reaching setting should always be specified when enabling console logging. A log rotation setting of 1MB is specified by default automatically.
| Note: Logs may actually grow larger than that specified by the Open new file after size reaching setting, due to the sampling time used in checking for the size of the logs. |
This task allows you to perform the following:
Enable or disable logging for a particular node
Change logging type; start logging or stop logging for the system console or the controller console. You can select either System Console Logging or Controller Console Logging , or both.
Rotate logs after the minimum log size rotation trigger has been reached
All users can view the console log files unless access controls have been applied, see “Access Control to Console Logging Facilities”.
| Note: For the L1 and MMSC controller types, system and controller
console logging should not be activated simultaneously.
The L1 and MMSC console connection functions will read from the same serial line, and therefore, will read/record the same console output coming from the controller. If a read-only or read/write connection causes a console type switch, the console logging follows the switch, regardless of what SGIconsole has opened for console logging when logging started. |
Making changes to your logging sessions will not affect other logging sessions that are active or inactive on a node. For example, if you have system console logging active for a node, and then you enable console logging, the system console logging will not be disabled (there is no need to specify system console logging again using the System Console Logging check-box).
To enable or disable console logging on a node, select the Node view in the Console Manager main window, and perform the following:
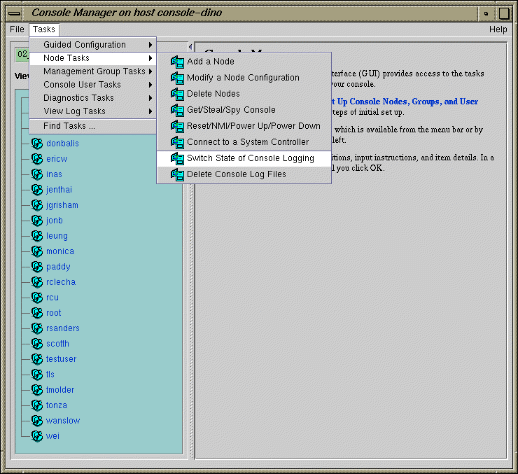
From the Tasks pulldown menu, choose the following, as shown in Figure 4-11.
Node Tasks -> -> Switch State of Console Logging
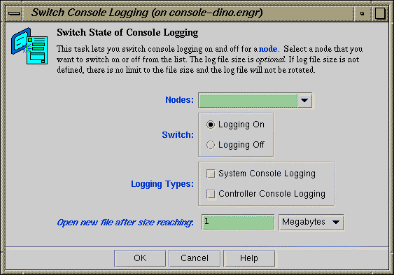
The Switch State of Console Logging dialog box appears, as shown in Figure 4-12.
In the Node field, select the node for which you want to enable or disable logging.
In the Switch field, click either the Logging On or Logging Off button.
In the Logging Types field, click either System Console Logging or Controller Console Logging, or both and a check mark appears.
In theOpen new file after size reaching field, enter a size for the log files in either Megabytes or Kilobytes. The log file size is optional. If log size file is not defined, there is no limit to the file size.
Click the OK button.
This tasks allows you to delete one or more log files.
To delete Console logs, perform the following:
From the Tasks pulldown menu, choose the following:
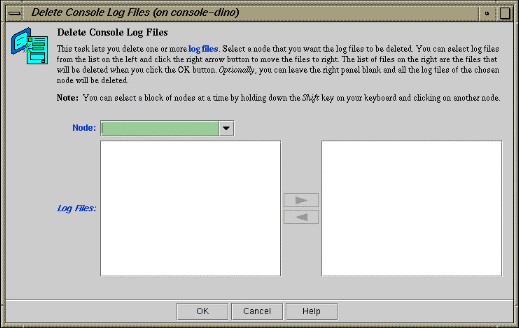
The Delete Console Log Files dialog box appears, as shown in Figure 4-13.Node Tasks -> -> Delete Console Log Files
In the Node field, select the node for which you want the log files deleted. You can select a block of nodes at a time by holding down the Shift key on your keyboard and clicking on another node.
Select the log files to be deleted from the left and move the files to the right. The list of files on the right are the files that will be deleted when you click the OK button. Optionally, you can leave the right panel black and all the log files of the chosen node will be deleted.
Click the OK button.
You enable or disable system or controller console logging using the log and nolog functions of the scons and ccons commands as follows:
The scons command provides options for system consoles.
The ccons command provides options for controller consoles.
The log function enables console logging for the pertaining console type.
The nolog function disables console logging for the pertaining console type.
For example, to enable a system console on node brickette , enter the command as follows:
SGIconsole> scons log brickette |
SGIconsole responds with an appropriate message depending on the successful application of the command. When enabling logging sessions for a node, SGIconsole prompts you for a minimum log size to apply to the files created for logging:
Set minimum log size to [1048576 bytes]: _ |
You can press the Return or Enter key to accept the default, or enter a different log size, such as 163840 bytes, as follows:
Set minimum log size to [1048576 bytes]: 163840_ |
In KB (245760 bytes), as follows:
Set minimum log size to [1048576 bytes]: 240K_ |
In MB (2097152 bytes), as follows:
Set minimum log size to [1048576 bytes]: 2M_ |
| Note: The log size values specified must be an integer. Real values are rejected without notification and cause the logging mechanism to accept the default instead. |
For more information on tscm(1), see “Command Line Interface to Console Manager” in Chapter 1.