This chapter provides the following information and instructions:
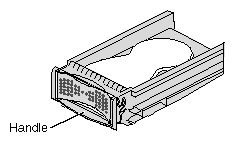
For this portion of the Duo installation, you need just the option drive.
 | Note: The wrist strap you attached in Chapter 1 should remain in place until all tasks are complete. |
 | Caution: Drives are easily damaged. Handle your drive carefully; do not drop it or handle it roughly. |
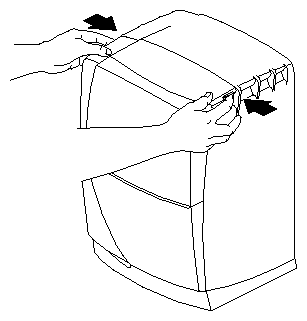
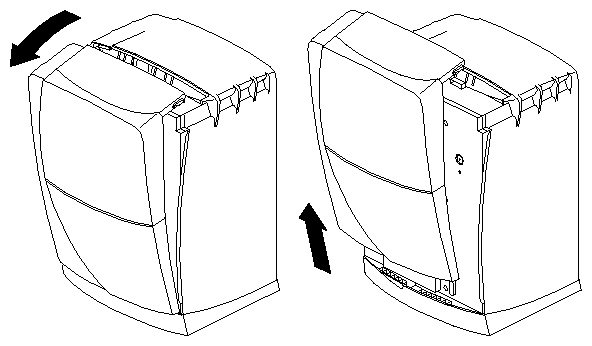
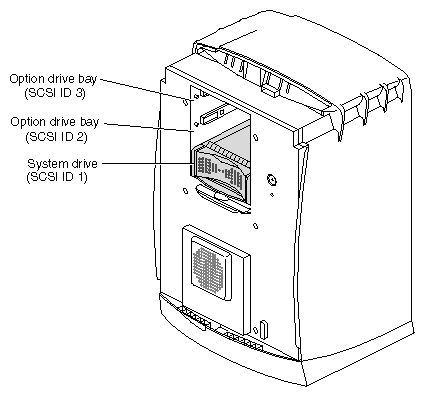
The option drive bays are the two top drive bays. Install an option drive in either one.
The OCTANE workstation automatically assigns an address to an internal drive. The system drive is SCSI ID 1, the drive directly above it is SCSI ID 2, and the upper option drive is SCSI ID 3.
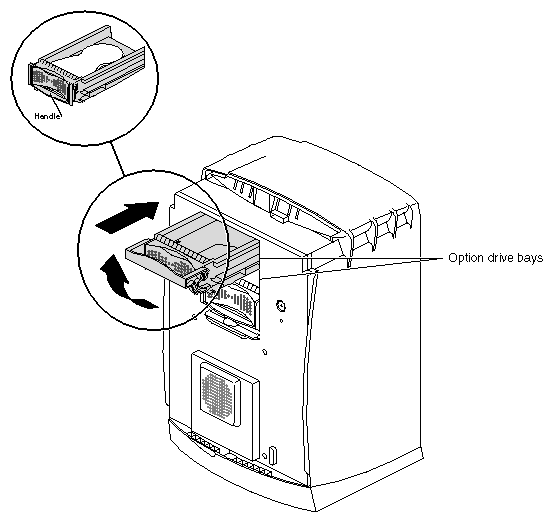
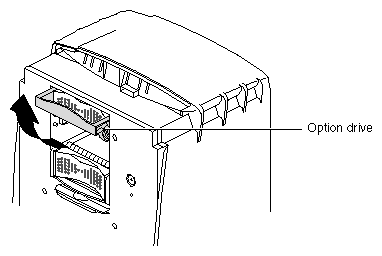
Lift the handle on the drive to a horizontal position, and slide the drive into the drive bay.
Slide the drive in gently until you feel solid resistance. The drive is connected to the frontplane when the front of the drive is flush with the chassis.
Caution: Pushing the drive into the frontplane with force can damage the drive.
With the drive completely inserted, rotate the handle downward to lock the drive in the workstation.
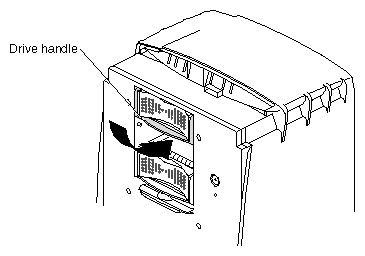
You have completed installing an option drive and are ready to remove the blank panel on the bezel.
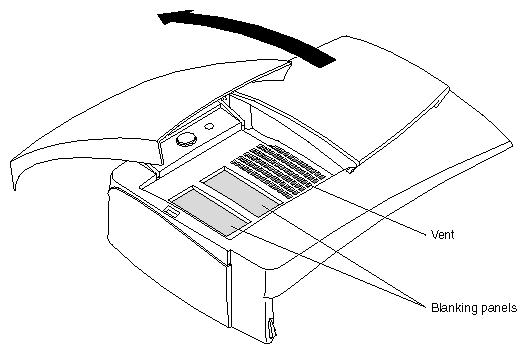
This section shows you how to remove a blank panel from the bezel.
Place the bezel on a flat surface so that the door is facing up.
Open the door.
Locate the blanking panel for the slot in which you installed the option drive.
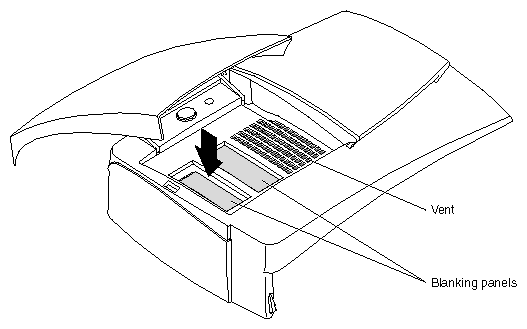
Press down on the blanking panel. It pops out the back of the bezel.
Keep the blanking panel. You must replace it if you ever remove the drive.
Caution: To prevent damage to your OCTANE workstation, you must place a blanking panel in the bezel if you have removed a drive. The blank panel ensures proper airflow through the workstation. Go to “Replacing the Bezel”.
Before removing an internal drive, you must unmount your drive. For more information, to to the Toolchest > Help > Online Books > End User bookshelf, choose the Personal System Administration Guide, and search for “Removing a Disk.”
After you have unmounted the drive, power off the workstation and remove the bezel. If you have not already done these tasks, go to Chapter 1 and follow all of the instructions in that chapter and this one until you get to this section.
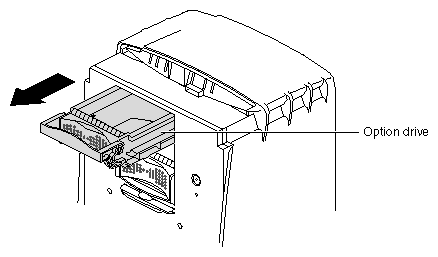
Lift the drive handle to unlock the drive.
Pull the drive directly toward you to remove it from the drive bay.
To install a drive in the option drive slot, go to “Sliding In an Internal Option Drive”.
To leave the drive bay empty, replace the blank panel before replacing the bezel. Go to the next section, “Replacing the Bezel.”
If you removed a secondary drive and do not intend to replace it, you must replace the blank panel.
Place the bezel face down on the flat surface with the door closed. (Place the bezel on a protective surface to prevent the bezel from being scratched.)
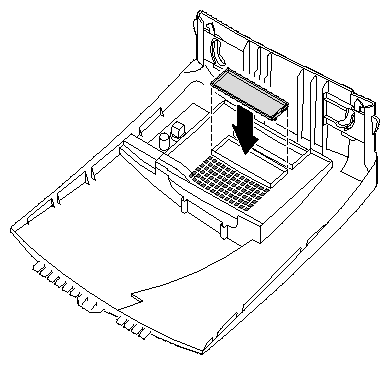
Locate the slot in which you want to place the blank panel and place the panel in it.
Press the blank panel until both sides snap firmly into place.
Replace the bezel.
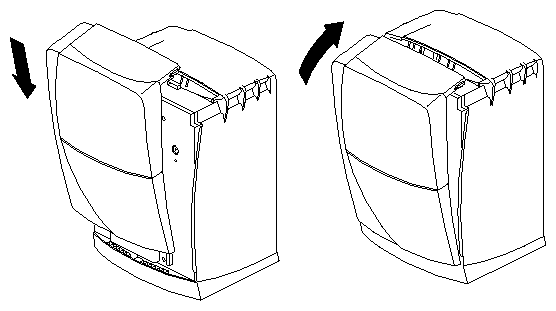
Lower the bezel into the lower edge of the chassis.
Hook the bezel in place.
Rotate the bezel back and into closed position.
You can hear the latches snap into place when the bezel is fully installed.
You have finished installing the option drive.
Your next task is to install memory. Go to Chapter 3 for installation instructions.