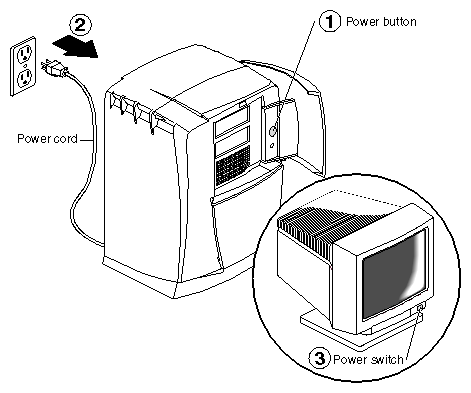
This chapter tells you how to shut down the OCTANE workstation and prepare for the tasks included in the Duo upgrade. The tasks are organized by chapter to simplify the Duo installation.
The tasks in this chapter include
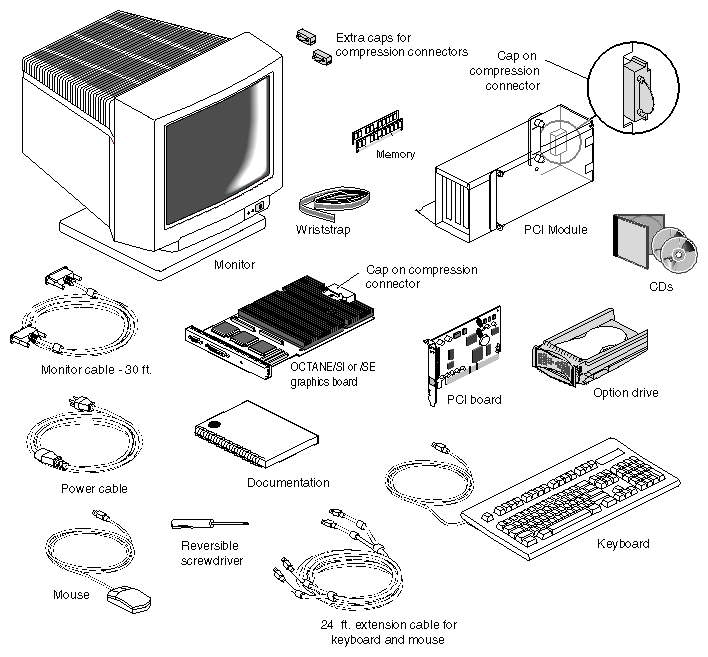
It is always a good idea to check your shipment when you receive it.
Install the software before you install the hardware. After the software and hardware are installed, Chapter 8 provides ssytem set up and verification instructions.
The software installation process for the Duo upgrade requires that you:
install patch software
back up the Xserver file
enable the Duo software
Read relevant fliers and the Duo release notes before installing the software. The README file on the Duo CD tells you where to find the release notes (OCTANE CADDuo Issues). It also tells you about the appropriate patches to install. The CD booklet provides detailed instructions for reading the release notes and installing the software.
 | Note: Always perform administrative tasks from the primary head, head 0. |
After installing the software from the Duo CD, back up the Xserver file, enable the Duo software, and replace the default login screen. Follow these instructions:
From the Toolchest > Desktop, open a UNIX shell.
At the prompt, type cp /var/X11/xdm/Xserver /var/X11/xdm/Xserver.orig.
At the prompt, type cp /var/X11/xdm/Xserver.2key /var/X11/xdm/Xserver.
Become superuser by typing su.
Type chkconfig visuallogin off
Type exit to exit superuser mode.
Restart the system. The new login screen appears.
You are ready to begin the hardware installation.

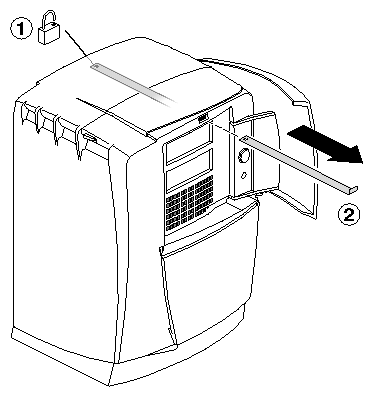
If you received a system upgrade label, place it on the system label.
Face the back of the OCTANE workstation. The system label (containing the model/CMN number) is located at the top center of the back of the workstation.
Place the label over the VCCI and CISPR 22 information.

For illustration purposes, the PCI module is shown installed.
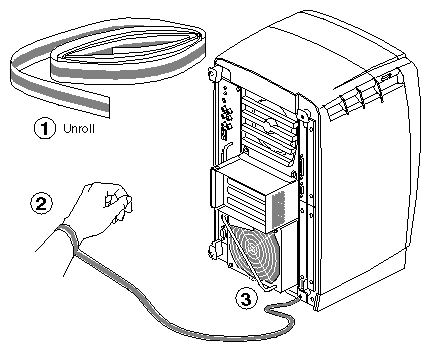
 | Caution: The components inside the OCTANE workstation are extremely sensitive to static electricity; you must wear the wrist strap while replacing parts inside the workstation. |
Unroll the first two folds of the band and wrap the exposed adhesive side firmly around your wrist.
Unroll the rest of the band and peel the liner from the copper foil at the opposite end.
Attach the copper foil to the XIO module, or, use any convenient and exposed electrical ground, such as a metal part of the OCTANE workstation.
Keep the wrist strap attached while you are installing parts of the Duo shipment.
Go to Chapter 2 to begin your next task, installing memory.