This chapter describes how to install an Origin200 server in a standard (non-Silicon Graphics) equipment rack. It includes information about:
installing side rails in the equipment rack
attaching rack-mounting hardware (ears) to the Origin200 chassis
lifting the Origin200 chassis into the rack and securing it
For complete instructions about configuring an Origin200 system, including adding drives, attaching cables, turning on the system, and logging in, see Chapter 2, “Setting Up an Origin200 System.”
This chapter also describes how to remove an Origin200 system from an equipment rack.
 | Warning: When installing a two-module system, or a attaching an Origin Vault expansion box, all chassis must be connected to the same, grounded power supply. If the chassis are not all connected to the same power supply, resulting differences in ground potential (current) can damage components on the Origin200 main system board. |
Origin200 systems that are configured for rack-mounting are shipped from Silicon Graphics with these components:
side rails to support the weight of the system
mounting ears and screws to attach them to the Origin200 chassis
end-caps to cover the mounting ears
You will also need the following fasteners (which should be provided from the manufacturer of the equipment rack, or a third-party):
fasteners to attach the side rails to the rack
screws to secure the Origin200 chassis to the rack via the mounting ears.
Your equipment rack should provide access to the rear of the server. The rear of the server is where the main power switch is located, as well as all of the connectors (power, networking, serial ports, diagnostic port, parallel port, and CrayLink Interconnect port). Connectors for any PCI options are also at the rear of the server.
See Chapter 1, “Overview of the Origin200 System” for a general description of both tower and rack-mountable installation methods and converting between them.
 | Caution: If you are installing a two-module Origin200 server, be extremely careful with the CrayLink Interconnect cable. Do not allow it to become kinked or bent excessively inside the rack. Be careful not to catch and smash it between the system and other parts of the equipment rack when sliding the Origin200 chassis in and out. |
Each rack-mountable Origin200 ships with two mounting ears and screws to attach the ears to the server. These ears provide a mechanism to secure the server in the rack and prevent it from sliding out. The ears do not bear any of the server's weight.
Follow these steps to install the mounting ears on the chassis:
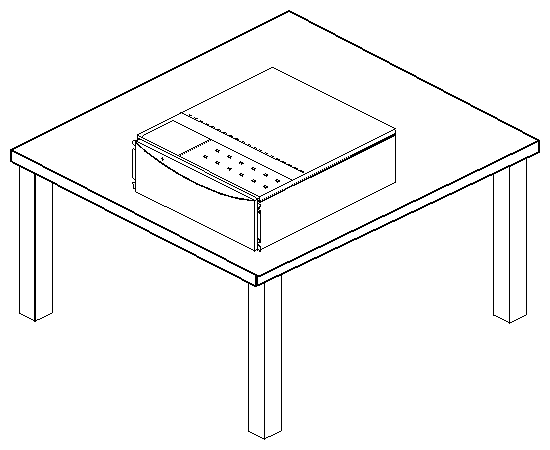
Place the Origin200 chassis on a flat, sturdy work surface capable of supporting at least 40 pounds (18 kg) and up to 75 pounds (34 kg).
Do not install any option drives in the system yet. Drives make the chassis heavier and more difficult to lift and move.
The system should be flat on the work surface, as shown in Figure 3-1.
-
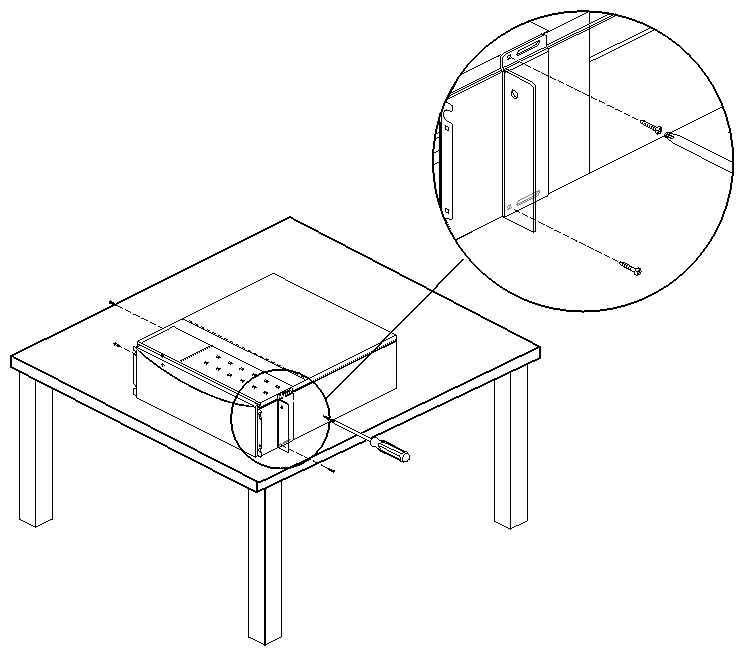
There are two ears, one for the left side and one for the right side. These are stamped “L” and “R” and are not interchangeable. See Figure 3-2.
Using a #2 Phillips screwdriver and the screws provided with the Origin200, fasten each ear to the side of the chassis, behind the front flange, as shown in Figure 3-3. Use two screws for each mounting ear.

If you wish to install internal options, such as additional memory and PCI cards, you should do so now.
For instructions about opening the system, see “Removing the System Cover and Chassis Access Door” in Chapter 4.
For information on installing memory, see Chapter 5, “Installing and Removing Memory.”
For information on installing PCI options, see Chapter 6, “Installing and Removing PCI Option Boards.”
You are finished attaching the mounting ears. Proceed to the next section to install the server in the equipment rack.
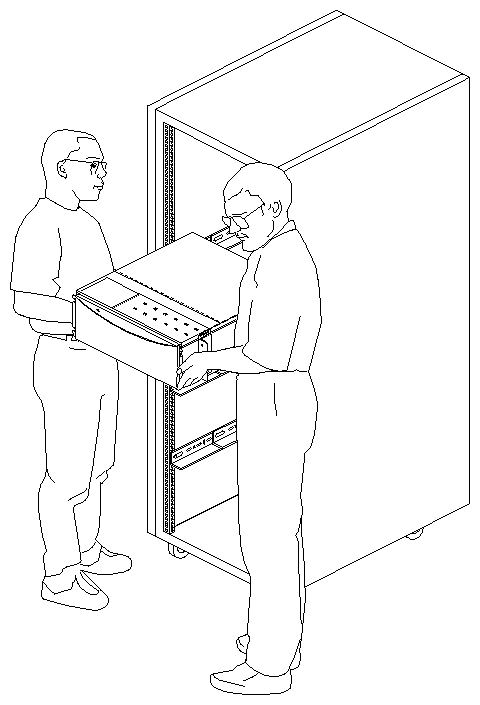
 | Note: Use two people to lift an Origin200 system. |
Follow these steps to install the Origin200 chassis in an equipment rack.
Recommended: Lock the front door with the key. This prevents the door from being pulled open accidentally while you install the server.
Install mounting rails or a shelf in the equipment rack.
The rackmountable Origin200 server ships with adjustable rails that can fit racks of various depths.
If you use a different mounting system, such as a shelf, make sure it can support at least 75 pounds (34 kg).
With a person on each side of the chassis, lift the server and move it to the equipment rack, as shown in Figure 3-4.
Place the server in the rack on top of the side rails, then slide it back into the rack.
Secure the server to the rack from the front, using the appropriate fasteners for your equipment rack.
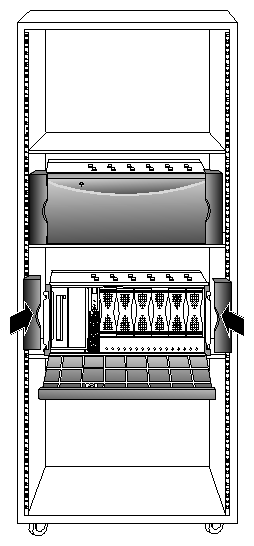
Attach the plastic end caps to the front of the server to conceal the mounting flange, as shown in Figure 3-5.
The system is shipped with two pairs of end-caps: one for 19-inch racks and one for 21-inch racks. Use whichever is appropriate for your installation.
You are finished installing the server in a rack.
If you have additional drives, you can install them in the system.
If you are installing the server for the first time, turn to Chapter 2, “Setting Up an Origin200 System” for information about attaching cables, the system console, and starting the server for the first time.
If you have a two-module Origin200 system, be extremely careful with the CrayLink Interconnect cable. Do not bend or yank on it while removing the server from the equipment rack.
Follow these instructions to remove an Origin200 system from an equipment rack:
Optional: Depending upon how far out of the rack you plan to pull the server, the length of your cables, and what you are planning on doing to the server, you may wish to unplug the cables attached to the rear of the system before you begin removing the chassis.
Recommended: Lock the front door with the key. This prevents the door from being pulled open accidentally while you are installing the server.
Recommended: Remove all drives from the system to make the chassis lighter and easier to carry.
Remove the plastic end caps.
Remove the screws that secure the mounting ears to the equipment rack.
With two people, slide the server out of the rack.
If you are servicing the Origin200, place it on a flat, sturdy work surface capable of supporting at least 40 pounds (18 kg).
You are finished removing the server from a rack.