This chapter explains the features of the SoftWindows window and describes how to use floppy disks and CD-ROMs with SoftWindows.
The screen illustrated below shows the main features of the SoftWindows MS-DOS window.
To bring this screen up on your display:
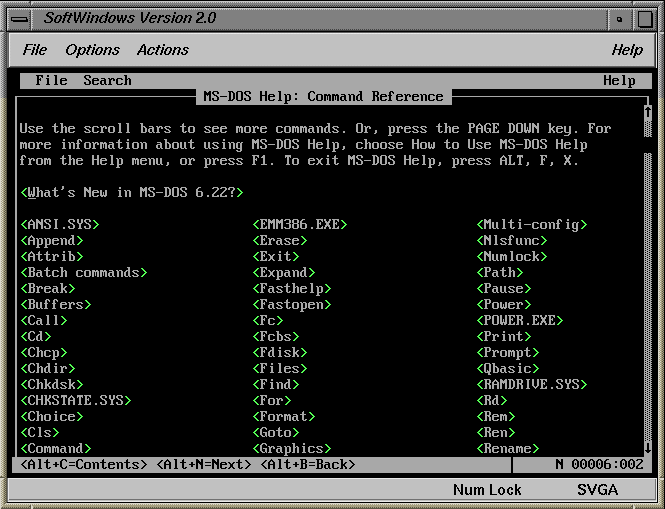
You can resize the SoftWindows window by dragging its corners or edges.
When you release the mouse button, the window will snap to the closest fixed size.
 | Note: The bigger you resize your SoftWindows screen, the more memory SoftWindows takes up. Try making the screen smaller if SoftWindows runs slower than usual. |
The status bar shows the status of SoftWindows using the indicators shown in the following table:
Table 4-1. Status Bar Indicators
Indicator | What it means |
|---|---|
Floppy disk drive A: is in use | |
Floppy disk drive B: is in use | |
Caps Lock mode is selected | |
Scroll Lock mode is selected | |
Num Lock mode is selected | |
The display type | |
SoftWindows graphics driver is in use for Microsoft Windows.
|
| Note: There is no status bar on the serial terminal version of SoftWindows. |
If you have a mouse attached to your workstation, you will be able to use it when you run Windows applications.
You can also use your mouse with MS-DOS programs that support a Microsoft Bus mouse by using the SoftWindows "Attach Mouse" command.
When you attach the mouse to use in MS-DOS, you cannot use the mouse in any other application on your workstation desktop. The SoftWindows menus will be inaccessible, and you cannot access X Windows belonging to other Unix applications.
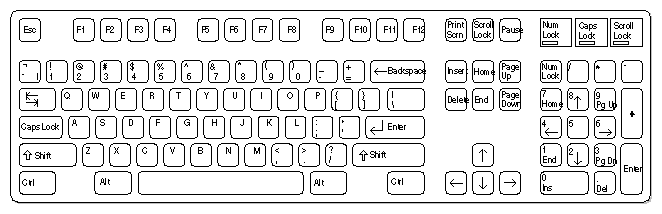
SoftWindows can use most Unix workstation keyboards to produce all the keys and key combinations you need to run MS-DOS applications. SoftWindows provides support for French, German, UK and US Unix workstation keyboards.
The tables on the following pages list the keyboard keys, or key combinations, needed to produce all the PC/AT keys that are found on a US version 101-key IBM keyboard that do not directly correspond to particular Unix workstation keys.
When SoftWindows is displaying the MS-DOS window, text can be copied from and pasted into the SoftWindows window using the following procedures.
Select the text you want to copy by holding down the Select mouse button (left, by default) and dragging the pointer over the text in the Unix window.
Lift your finger off the mouse button.
Move the mouse pointer into the SoftWindows MS-DOS window and position the cursor where you want to paste the text.
Click the middle mouse button.
Select the text you want to copy, by holding down the left mouse button and dragging the pointer over the text in the SoftWindows MS-DOS window.
Lift your finger off the mouse button.
Move the mouse pointer into the Unix window and position the cursor where you want to paste the text.
Click the middle mouse button.
The text will be typed into the Unix window at the current cursor position.
SoftWindows includes an Insignia utility called SmartCopy, which converts text and graphics between the Windows and X Windows clipboards. Use SmartCopy to copy or cut and paste between X Windows and Windows applications.
When you move the mouse pointer out of the SoftWindows window, the SmartCopy icon changes to show when text or graphics is ready to paste into an X application:

When you move the mouse pointer into the SoftWindows window, the SmartCopy icon changes to show when text or graphics is ready to paste from an X application:

Choose the appropriate command in the X Windows application to copy the text you want to transfer.
Move the mouse focus to SoftWindows.
SmartCopy converts the text to Microsoft Windows format on the Windows clipboard, and you can use the Clipboard Viewer to view it.
Move the mouse pointer to position the cursor where you want to paste the text.
Choose Paste from the Edit menu of the Microsoft Windows application into which you want to paste the text.
Choose From Display from the Paste Graphics cascade menu on the Actions menu.
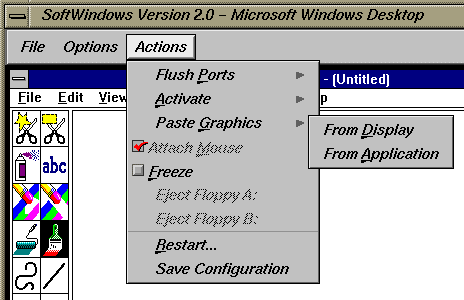
The cursor changes into crosshairs, allowing you to select a portion of the display which will be copied to the Microsoft Windows clipboard.
To view the graphic:
Open the Clipboard Viewer.
Choose DIB Bitmap from the Display menu.
To paste the graphic into a Microsoft Windows application:
Choose Paste from the Edit menu of the Windows application into which you want to paste the graphic.
| Note: Using the Pasting Graphics From Display function may cause unpredictable results. Try Paste Graphics From Application from the Actions menu for the best quality graphics. See “To copy graphics from the Unix workstation screen to Microsoft Windows.” |
Choose the appropriate command in the X Windows application to copy the graphic you want to transfer.
Switch to SoftWindows.
Choose Paste Graphics from the Action menu, and choose the From Application option.
The graphic is converted into Microsoft Windows format on the Microsoft Windows clipboard.
Choose Paste from the Edit menu of the Microsoft Windows application into which you want to paste the graphic.
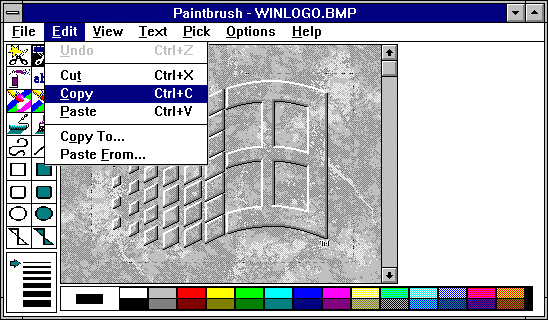
Select the text or graphic you want to copy from the Microsoft Windows application.
Choose Copy from the application's Edit menu.
The text or graphic is put into the Windows clipboard, and you can use the Windows Clipboard Viewer to view it.
Switch to the X Windows application you want to use.
SmartCopy converts the text or graphic to X Windows format in the X clipboard.
Choose the appropriate command to paste in the text or graphic you copied.
SoftWindows lets you work with 3.5-inch MS–DOS format floppy disks using the floppy disk drives on your Unix workstation.
| Note: A process called the media daemon (mediad) usually controls all access to removable media under Indigo Magic. To access the floppy drive from SoftWindows, you must work with mediad or disable mediad. If you work with mediad, some formatting and copying functions will not work. Instructions and restrictions follow. |
SoftWindows ships with the K: drive mapped to the "/floppy" UNIX directory. Put your floppy in the floppy drive and open the K: drive.
Using mediad, you will not be able to
Format a floppy disk from within SoftWindows.
Completely copy one floppy to another from within SoftWindows.
Using this method provides the most compatible access to the drive from Windows. The drive will be used exactly as a floppy would be used under MS-DOS or Windows. Complete disk copies and fromats will work.
Before using floppy disk drive A: or B: you need to assign it to the internal 3.5" floppy disk drive on your computer.Use the "Open Drive" function on the Disk Drives cascade menu on the Options menu.
Make sure you have either disabled mediad, or know the restrictions mediad creates. See Chapter 4, “To access the floppy drive using mediad” and Chapter 4, “To access the floppy drive by disabling mediad”.
Insert the disk into the workstation's floppy disk drive.
Attach the disk by choosing Attach Floppy A (or Attach Floppy B) from the Actions menu, depending on whether you have assigned drive A: or B: to the floppy disk drive.
A: (or B:) appears in the SoftWindows status bar indicating that the drive is attached and that you can now access the disk from SoftWindows.
For example, to see the contents of the disk, type one of these commands at the MS-DOS prompt:
DIR A:
or
DIR B:
Use the FORMAT command at the C:\> prompt. See Chapter 7, “FORMAT”.
There are two ways to access the CD-ROM drive from SoftWindows.
Try Chapter 4, “To access the CD-ROM drive using mediad”first. This is the easiest way to use the CD-ROM drive.
If this method doesn't work, then try Chapter 4, “To access the CD-ROM drive by disabling mediad”.
| Note: A process called the media daemon (mediad) usually controls all access to removable media under Indigo Magic. To access the CD-ROM drive from SoftWindows, you must work with mediad or disable mediad. |
SoftWindows ships with the F: drive mapped to the "/CDROM" Unix directory. Just put your CD in the CD-ROM drive, and open the F: drive.
Some PC programs do not respond to the F: drive. You should disable mediad only if opening your F: drive doesn't work. See Chapter 4, “To access the CD-ROM drive using mediad” for details on using the F: drive.
| Note: Once you have disabled mediad, you cannot access your CD-ROM drive from the Indigo Magic desktop or from a shell. You can only use the CD-ROM drive from within SoftWindows. |
Disable mediad by either:
Killing mediad by issuing a “mediad -k” command as root. See Chapter 4, “To disable mediad by using "mediad -k"”.
or
Removing the drive from the mediad monitor list. See Chapter 4, “To remove the drive from the mediad monitor list”.
Open a shell from your Toolchest by selecting Desktop, and choosing Unix Shell
In the shell, type
su
mediad -k
This will cause all access to removable media to stop working.
To restart mediad, simply enter the command “mediad” as root.
Open a shell from your Toolchest by selecting Desktop, and choosing Unix Shell
In the shell, type
su
mediad -ir /dev/scsi/sc0d4l0
| Note: The 4 represents the SCSI id of the drive, this is correct for the INDY but might be different for other configurations. Use the Disk Manager from the Indigo Magic Desktop to verify the SCSI id of your CD-ROM drive. |
Step 1 changes your desktop access to the drive from Indigo Magic. To change your desktop access back, do this:
Type the following lines in your Unix shell:
su
mediad -o mon=on -ip /dev/scsi/sc0d4l0 /CDROM
Choose the “Disk Drives->Open Drive...” from the SoftWindows “Options” menu.
Type the device name “/dev/rdsk/dks0d4vol” in the box adjacent to “CD-ROM Device File Name”.
This device name is different from the one used to control mediad. The SCSI device number will be the same.
Enter the command "NET USE F: /D" at the MS-DOS prompt. This replaces the CD-ROM drive in the mediad monitor list.
Enter the command “USECD” at the MS-DOS prompt before starting Windows. This will assign the CD-ROM to the F: drive.
Access the CD-ROM drive from the F: drive. To change the drive used from F: to another drive, use the MSCDEX command instead of the USECD batch file (C:\INSIGNIA\USECD.BAT). For example, to use the Q: drive type:
MSCDEX /D:CDROM$$$ /L:Q |
SoftWindows includes software called the File Sharing Architecture (FSA) that allows MS–DOS files to be stored in the Unix file system and still be accessed by MS–DOS and Windows applications as though they were on an MS–DOS disk.
If you were using a PC, the FSA drive would be on another computer and MS–DOS would be able to access it through a network driver. SoftWindows uses this attribute of MS–DOS to access a specified Unix directory, which can either be on your workstation's hard disk or on an NFS-mounted file system from a remote server.
The MS–DOS files in an FSA drive reside as individual Unix files and can be used by Unix programs that can work with MS–DOS files.
Not all Unix filenames are valid as MS–DOS names. You should adhere to the MS–DOS filename conventions when creating files in the Unix file system that you will want to access from SoftWindows.
MS–DOS filenames have the form:
name.ext |
where name is eight characters or less, and the optional ext is three characters or less.
Filenames can include the letters A–Z, the digits 0–9, and the following symbols:
_ ! # $ % & @ ^ ~ |
However, all of these characters except _ (underscore) are special characters in Unix, so it is recommended that you avoid them in filenames.
Upper and lower case letters are considered equivalent. Unix filenames should usually use all lower case, because the files named with lowercase letters are given priority when a conflict occurs. You can configure SoftWindows so that the priority is given to upper case; refer to the SoftWindows for Unix Administrator's Guide.
When accessing Unix files using an FSA drive, a Unix filename that does not adhere to the above restrictions is converted to a legal name, although it may not be accessible to MS–DOS if another file of the same name already exists.
For example, if you list the files in your Unix home directory, the file:
.profile |
will be given the name:
PROFILE.5AV |
Type the following command at the MS-DOS C:\> prompt:
NET USE
This will list the drive letter of each FSA drive followed by the Unix pathname of the directory to which it is attached.
| Note: The not sharing message is normal, and refers to MS-DOS SHARE. |
When SoftWindows is first installed, the following drives are set up for you:
Table 4-2. Automatically Installed Drives
Drive | Unix directory |
|---|---|
E: | Your home directory |
F: | Your CD-ROM drive |
G: | Directory required to install Microsoft Windows |
H: | Your home directory |
K: | Your floppy drive |
Use the MS-DOS COPY command.
For example, to copy the file MYDATA.TXT from the MS-DOS C: drive to your Unix home directory you could type:
COPY C:\MYDATA.TXT E: |
For more information refer to Chapter 7, “Using MS–DOS commands”.
SoftWindows includes Insignia's SoftNode networking software to enable you to access PC network file servers from SoftWindows running on a Unix workstation.
You, or your system administrator must set up networking access. After net work access is set up, you have the same access to a PC file server as a PC user, including the ability to run multi-user PC applications.
For more information on setting up network access using SoftNode, refer to the SoftWindows for Unix Administrator's Guide.
Use the Sound function to use the Unix workstation's sound facilities to emulate a limited range of PC sounds.
Use the FPU Emulation function to select the SoftWindows emulation of the PC Floating Point Unit.
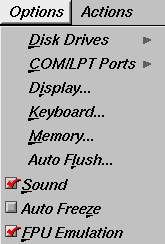
| Note: PC applications that generate complex sounds, such as digitized voices or music, may run slowly even if the Sound function is disabled. In this case you should turn off sound in the PC application. |
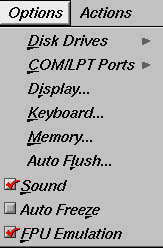
After choosing this function you will need to restart SoftWindows, and a dialog box is displayed to allow you to proceed or cancel the function.
| Note: Due to the different precisions of the PC FPU and the emulated FPU, some programs may run differently than a PC when FPU emulation is enabled. For example, the rounding of decimal numbers may be incorrect. In such cases the FPU emulation should be disabled. |
Use the Activate function to control which of the PC drives, A: to D:, or the PC ports, LPT1: to LPT3:, or COM1: to COM4:, are reserved for use by SoftWindows.
SoftWindows will always try to activate a drive or port when it is first selected, according to the settings in the Open Disk Drives, Comms Ports, and Printer Ports dialog boxes; refer to the SoftWindows for Unix Administrator's Guide, and Chapter 5, “Printing, input, and output”.
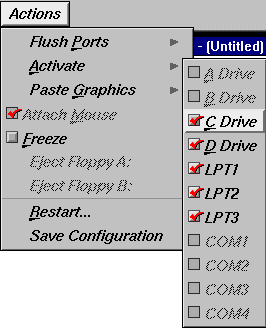
Devices in use by SoftWindows are shown with checkmarks next to their names in the cascade menu.
Entries with no device assigned to them are shown grayed out in the menu.
Choose the corresponding drive or port from the Activate cascade menu.
Choose C Drive or D Drive from the Activate cascade menu.
When a button is shown beside the drive name, you have read and write access, and other users only have read access.
When there is no button beside the drive name, you only have read access, allowing another user to write to the drive.
Any number of users can have read access to a hard disk file, but only one can have write access at any time.