This chapter is designed to help you become familiar with using SoftWindows by installing and running a typical Windows application and printing from Windows.
The tutorial is based on the award-winning Windows program WinPost, which is supplied on the SoftWindows hard disk file. WinPost lets you create simple reminders which you can leave on your Windows desktop. It is a PC shareware application—if you like WinPost and decide to continue using it, please send the author the registration fee as described in its on-line manual.
As with most applications, WinPost is installed using a standard Windows setup procedure.
The installer and its associated files are supplied in the C:\WNPST directory.
The most convenient way of installing Windows applications is from the Windows Program Manager.
At the MS–DOS C:\> prompt type:
win
After the Windows welcome screen the Windows desktop will be displayed.
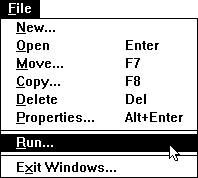
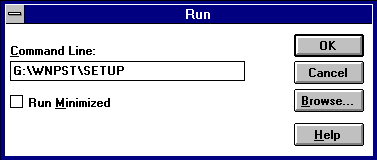
This dialog box allows you to specify the directory into which WinPost should be installed:
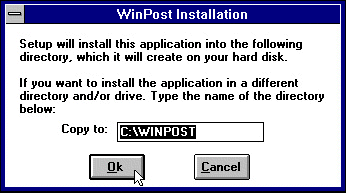
Click OK to install in the WINPOST directory on your SoftWindows hard disk file.
The files are then copied to the directory you specified.
Finally, this dialog box informs you when the installation is complete:

Click OK to return to the Program Manager.
The installation creates a new WinPost group in the Program Manager, containing three icons:

WinPost 3.2 is the WinPost application.
WinPost Manual provides documentation for WinPost. Double-click the icon to display the document so that you can read it or print it out.
Read Me! is a document which gives additional information about WinPost.
When you install a Windows application, the installer usually creates icons for the application and for any other programs or documents you might need to use with it. Often these are put in a separate group in the Program Manager.
See Chapter 6, “Using Windows” for more information about the components of Windows.
Double-click the WinPost 3.2 icon.
The first time you run WinPost, a shareware registration notice is displayed informing you that you can evaluate WinPost for 21 days.
Click OK to dismiss the notice.

The WinPost program is now running and its icon is displayed at the bottom of the SoftWindows desktop.
Double-click the WinPost icon on the Windows desktop.
An empty Note window appears.
Type in the information you want to remember.
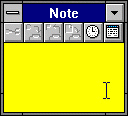
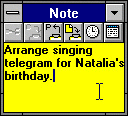
The buttons along the top of the note provide useful functions. For example, the first three are cut, copy, and paste.
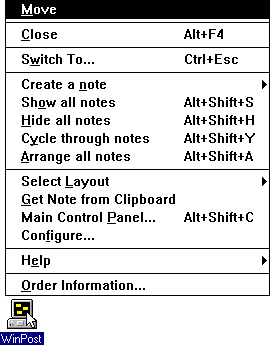
Some of the commands on the WinPost menu are described below.
For more information about all the commands refer to the WinPost Manual file.
Choose "Hide all notes" from the WinPost menu.
The notes will be minimized to a single "Notes – All" icon on the Windows desktop:

Choose "Show all notes" from the WinPost menu or double-click the Notes – All icon on the Windows desktop.
Choose "Arrange all notes" from the WinPost menu.
The notes will be arranged in a cascade from the top left of the Windows desktop.

You can print from Windows applications to the printer available to your Unix workstation.
To illustrate printing from Windows, print the note you have created.
Before printing you need to ensure that SoftWindows is set up for the Unix printer you want to use.
By default, SoftWindows and Windows are set up for a PostScript printer.
 | Note: If your Unix printer does not support Postscript, you need to reconfigure SoftWindows before you can print. Refer to Chapter 5, “Printing from Windows applications”. |
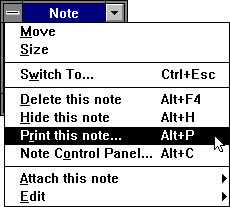
Click the control menu button, in the top left corner of the Note window, to display the control menu.
Choose Print this note… from the control menu.
Alternatively, you can press the Alt and P keys at the same time.
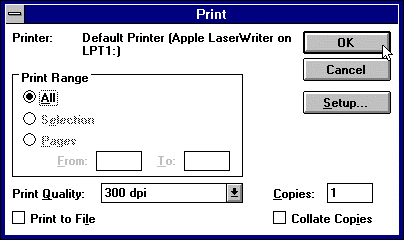
The Print dialog box appears:
Click OK to print the note.
While applications are printing from Windows the Print Manager icon appears at the bottom of the Windows desktop.

You can double-click this icon to see a list of the jobs waiting to be printed by Windows.