This chapter demonstrates the basic DataSync functionality through the ClusterFly demo. The application ClusterFly is a basic visual simulation application that can load, store, and display scene databases in many common formats. This chapter describes how to use ClusterFly to look at several sample databases provided with the SGI Graphics Cluster.
The following sections describe ClusterFly:
The ClusterFly demo provides a graphical user interface (GUI) with which you can control many visual simulation features such as time-of-day selection, fog density, and so on. These options all default to reasonable values; so, you do not need to learn about them before using ClusterFly.
 | Note: To faciliate the description of ClusterFly operation, this section assumes your cluster consists of the following four nodes: master-channel, channel0, channel1, and channel2. |
The following sections describe ClusterFly operation:
In order to run ClusterFly, start an identical copy of the program cfly on each of the channel nodes. You can either run cfly manually on each node, or you can use a script that runs cfly on them from a single node. The following subsections show each one of these operation modes using a data file called town_ogl.pfb.
If you wish to run each node separately, on each node enter the following:
% setenv PFSERVER master-channel % cfly town_ogl.pfb |
Start at the leftmost node and advance to the right. As new nodes start, cfly breaks the viewer field of view among all the available hosts from left to right in the order that they were activated.
If you wish to start cfly from a single node, do the following:
Ensure all nodes have logged in and have executed the following command:
% xhost +
Start cfly using the provided script on the node master-channel:
% run_all_cfly town_ogl.pfb
The following is the contents of the script run_all_cfly:
#!/bin/csh
# start ImageSync.
/usr/share/ImageSync/bin/imagesync -v
# Start cfly application on all channels listed in /etc/channel_list
# Channels should be listed from left to right to ensure correct
# breakup of the cfly field of view.
set list=`cat /etc/channel_list`
# assume DataSync server runs on master host (this host)
set server=`hostname`
set c=0
set i=2
while ( $c <  $list[1] )
rsh $list[$i] /usr/bin/X11/run_cfly $server $* &
@ c = ($c + 1)
@ i = ($i + 1)
sleep 3
end
Each channel node contains the script run_cfly, which consists of the following:
#!/bin/csh
setenv PFSERVER $1
setenv DISPLAY :0
setenv __GL_SYNC_TO_VBLANK 1
shift
/usr/bin/X11/cfly $*
Note that the script run_all_cfly uses the channel information file /etc/channel_list. The script assumes that this file lists channel nodes in the order determined by the left-to-right position of their display monitors. If your channels come up with incorrect view offsets, check the file /etc/channel_list.
The ClusterFly GUI provides a control panel with an assortment of controls. You can operate the control panel using the mouse buttons and the keyboard attached to node channel0 ( or the node that started running cfly first).
Many other keys on the keyboard are active and can be used to control ClusterFly even when the control panel is not displayed. For full details, the perfly man page contains a list of these key sequences and their effects, as well as details on motion models.
Entering cfly -H at the command line displays a list of the command-line options. For instance, the ClusterFly program allows several motion models; the –d on the command line tells the program to start in the Drive model, which provides an easy way to drive or walk through a scene while maintaining a fixed height above the ground.
Look around the scene using the mouse. First, place the cursor in the center of the simulation window. Now depress the middle mouse button and move the mouse to the left or right to turn in place; you will continue to pivot until you place the cursor back in the center of the screen.
Do not worry if you inadvertently start moving around, lose sight of the building, or otherwise lose position or control. Just move the cursor into the control panel area and click the Reset All button on the control panel to get back to the original setup.
To approach the City Hall model, turn until you are facing it (if you are not already facing it) and then center the mouse in the screen. Depress the left mouse button briefly to start accelerating forward. When you release the button, you will continue gliding forward at constant speed and can hold down the middle mouse button to steer. The ClusterFly application shows you how the basic visual simulation tools work. This example uses a section of the New Jerusalem City Hall (see Figure 3-1).
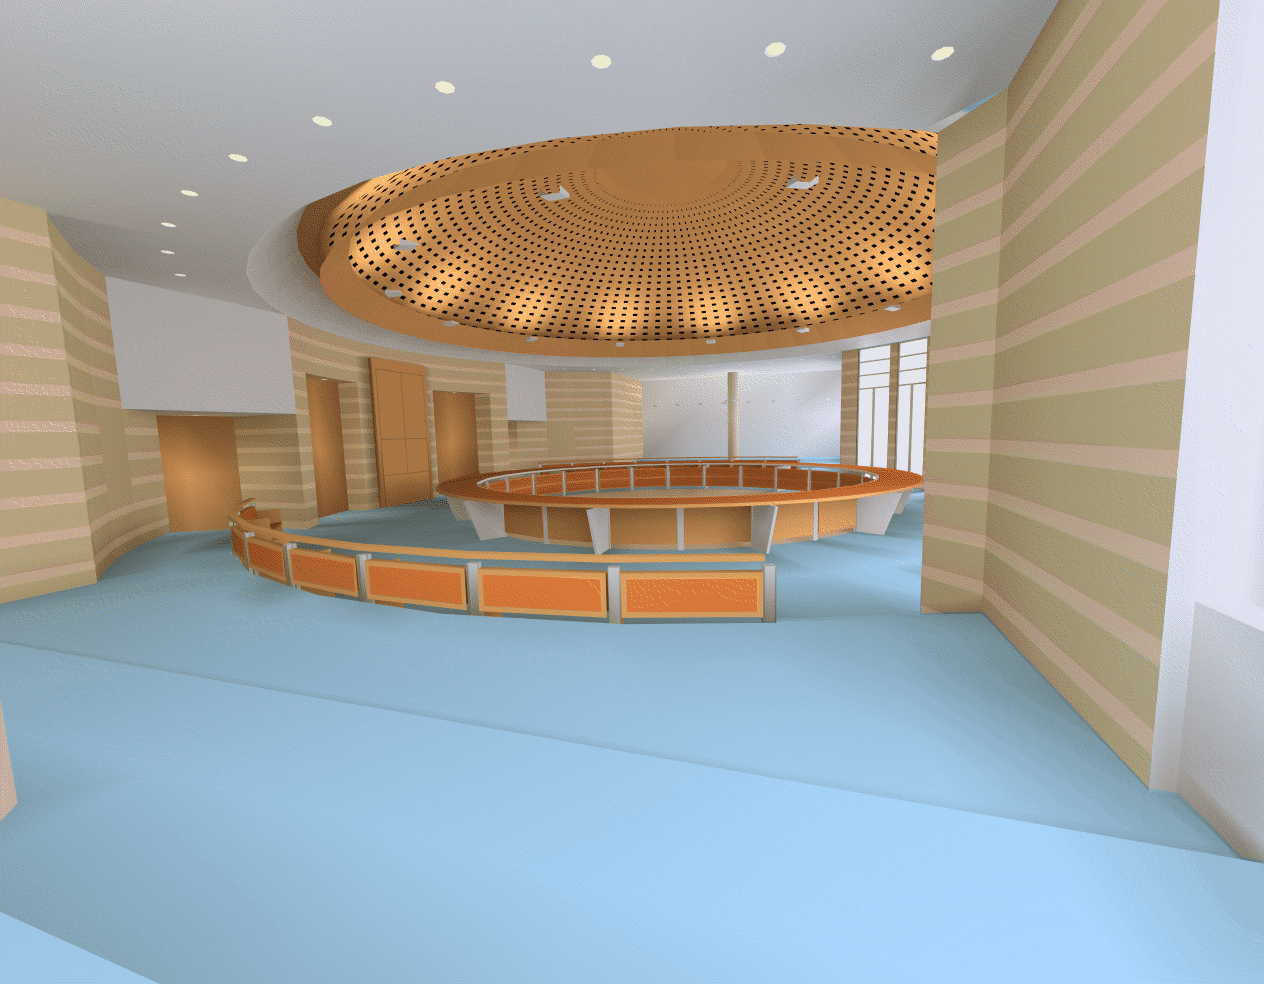
Tap the middle mouse button to stop in front of the building (if you actually entered the building, remember the Reset All button). Now accelerate backward by pressing the right button. When you are as far back as you want to go, hold down the left mouse button to gradually slow down, or tap the middle mouse button to stop immediately.
Now use the left mouse button again to start moving forward and drive slowly into the model. Notice that the walls closest to you are cut away at first so you can see inside; when you are completely inside the building, those walls reappear. Drive around and explore the building. Tap the middle mouse button to stop before you run into anything (but do not worry—at this point you will bounce off any walls you hit). If the walls get in your way, you can turn off collision detection with the button labeled Collide on the control panel, or press the c key on the keyboard.
To see the underlying geometry used to create the model, click the Style button in the control panel, or press the w key on the keyboard. This changes the display to wireframe mode. In this mode you can more easily see how many polygons are used to represent an object. This information can be helpful when you are tuning a database, because it is important to know when the number of polygons becomes a limiting factor. To turn wireframe mode off, just click the Style button (or press w) again. The W key can be used to cycle through several different drawing styles.
To close the entire control panel (and devote the entire screen to the model), click the GUI Off button at the upper right of the control panel, or just press the F1 key. Press the F1 key again to restore the control panel. The GUI is part of libpfutil. See the sample program, /usr/share/Performer/src/pguide/libpfutil/utilui.c.
If you click the Stats button in the control panel, a transparent panel showing scene statistics appears overlaid on the screen. The buttons next to the Stats button allow you to choose one of the available statistical displays. Try moving around in the scene while watching how the statistics change. Note in particular that the number of triangles being considered for rendering changes drastically depending on where you look; this demonstrates OpenGL Performer's use of culling to ignore objects that are completely outside the field of vision. For more information about culling and the statistics panels, see the OpenGL Performer Programmer's Guide.
The control panel's field-of-view slider can be used to select a wide angle view, up to 100 degrees.
As you travel through the building, try turning on the fog effect by clicking the Fog button. Experiment with the fog density and other controls. (Remember: If you have closed the control panel, the F1 key restores it.)
So far you have been driving. There are other default motion models provided through the libpfui library. These motion models can be subclassed to create your own models. You can find the source code for these motion models in the directory /usr/share/performer/src/lib/libpfui/.
The Fly motion model provides an alternative to the Drive model. This model allows full motion in three dimensions (unlike the Drive model, which does not allow vertical motion). The mouse in the Fly model is used in much the same way to control motion, but when steering, the vertical position of the mouse in the window controls your vertical tilt. You can select this mode by pressing the right mouse button on the button marked Drive and select Fly from the menu.
As when driving, the left mouse button makes you go forward and the right mouse button makes you go backward. As long as either button is pressed you will continue to accelerate.
You turn by holding down the middle mouse button and moving the cursor away from the center of the simulation window. Moving the cursor left or right causes left or right turns, respectively. Moving the cursor up or down causes the view direction to tilt up or down, respectively. The rate of turning and tilting is scaled by the distance of the cursor from the center of the simulation window; that is, no change of direction occurs when the cursor is at the center and full-speed rotation occurs at the edges of the window.
If you want to maintain a steady velocity rather than accelerating, hold down the middle mouse button to steer while using the left and right buttons to control the speed. To stop, tap the middle mouse button.
The Trackball motion model provides a third option for controlling motion. You can select this mode by pressing the right mouse button on the button marked Fly and selecting Trackball from the menu.
In trackball mode, when you drag with the middle button the object rotates about its center as if it were attached to a large trackball that fills the screen. Dragging up and down causes rotation about the horizontal axis parallel to the screen; dragging left and right causes rotation about the vertical axis parallel to the screen.
By dragging with the left mouse button, you can translate the object in the direction you drag: left, right, up or down. By dragging with the right mouse button, you can translate the object in and out of the screen. In all cases, if you release the mouse button while dragging, the motion continues on its own.
There are other approaches to traveling through a scene than the models described here. For instance, you can build a specific path into the viewer, to prevent the user from straying outside your model. The Path model is supported by a general path-following system in the libpfutil library. Many simulation applications require path support for such objects as cars, trucks, and people (in driver-training software); waiting aircraft both on the ground and in the air (in flight simulation); and opposing forces in military trainers. Path support in libpfutil allows paths of varying speeds to be built from line segments and arcs with automatic fillet construction between segments for smooth transitions.
The ClusterFly demo is a good demonstration of DataSync and OpenGL Performer in action because it is a complete application. It is, however, a large and complex piece of code. The program cfly is based on the perfly sample code. This section assumes that you have a basic knowledge of the perfly sample code. An overview of perfly is available in the OpenGL Performer documentation.
This overview of the cfly source code consists of the following subsections:
This subsection describes the changes made to perfly in order to create cfly.
In general, all the global information in perfly is shared among the cluster nodes. This information is stored in a global variable named ViewState. The naive approach would assign ViewState for sharing via the DataSync API. Unfortunately, ViewState contains pointers to node-local objects such as pfDCS nodes. Sharing the exact contents of ViewState would therefore share the pointers to the pfDCS nodes (incorrect). Moreover, the intent is to share information in two phase-shifted stages:
Right before starting a new frame (before calling pfFrame()), share latency critical information like the viewer camera position.
Right after a frame and before suspending in wait for a new frame (between pfFrame() and pfSync()), share the bulk of the required information—for example, draw modes, positions of vehicles, time of day, etc.
There are two new memory structures containing data for the two phase shifted stages:
ClusterViewState_pre for sharing data before calling pfFrame()
ClusterViewState_post for sharing data between pfFrame() and pfSync()
The intent was to keep the changes to the perfly source code to the necessary minimum. The new file cluster.C contains all the code accessing the DataSync cluster API. The original code contains new function calls in three places:
| Initialization | In function initViewState(), call InitClusterViewState() for initializing DataSync. | |
| Pre-Frame | In function localPreFrame(), call functions sendClusterViewState_pre() or recvClusterViewState_pre(), depending on the variable ViewState -> clusterRole. The first node to start up cfly has clusterRole ROLE_MASTER. All other nodes have clusterRole ROLE_SLAVE. These functions propagate the latency-critical portion of ViewState. | |
| Post-Frame | In function updateSim(), call functions sendClusterViewState_post() or recvClusterViewState_post(), depending on clusterRole. These functions propagate the non-latency-critical portion of ViewState. |
The perfly code contains a few other changes. In multiple places a node with clusterRole ROLE_SLAVE should skip some standard operations—for example, setting camera position.
The code starts by initializing the DataSync library. Initializing requires initialization parameters as in the following code:
dsInitParams *initParams = new dsInitParams(); dsInit(initParams); |
The program must now get a handle to the DataSync server. We use the environment variables PFSERVER and PFPORT to select the server host and port. Once selected, the program calls dsOpen() and receives a handle to the server as shown in the following:
dsOpenParams *openParams = new dsOpenParams();
if ((server = getenv ("PFSERVER")) != NULL)
	openParams -> setAddress(server);
else
	openParams -> setAddress(server_name);

if ((port = getenv ("PFPORT")) != NULL)
	openParams -> setPort(atoi(port));
dsServer *svr = dsOpen( openParams );
|
The program now allocates memory in the Performer shared arena for all the data structures that it wants to share via DataSync. These include the pre-pfFrame() and post-pfFrame() structures as well as a DataSync session information block. The following code shows the memory allocation:
ViewState -> SessionData = (ClusterSessionData *)
                     pfCalloc (sizeof (ClusterSessionData), 1,
                     pfGetSharedArena());
ClusterViewState_pre = (ClusterSharedViewState_pre *)
                     pfCalloc (sizeof (ClusterSharedViewState_pre), 1,
                     pfGetSharedArena());
ClusterViewState_post = (ClusterSharedViewState_post *)
                     pfCalloc (sizeof (ClusterSharedViewState_post), 1,
                     pfGetSharedArena());
|
The program tries to add a session to the DataSync server. Only one cluster node can add a session of a given name. The DataSync server returns a non-NULL result to that node. The program designates this node to be the master of the cluster. All other nodes are slaves of that master. The following code shows adding a session and finding the master:
dsSession *session = svr->addSession( session_name );
if (session) // Success - I'm the first use of this session.
{
    ViewState -> clusterRole = ROLE_MASTER;
    sprintf (ViewState -> UserName, "master");
    ViewState -> SessionUser = session->addUser(ViewState -> UserName);
    ....
}
else
{
    ViewState -> clusterRole = ROLE_SLAVE;
    sprintf (ViewState -> UserName, "slave[%d]", getpid());
    dsSession *session = svr->login( session_name );
    ViewState -> SessionUser = session->addUser(ViewState -> UserName);
    .....
}
|
A master receives a pointer to the newly created session and is considered logged in to the session. A slave has to log in to a session in order to receive a pointer. Once a session pointer is obtained, the master and the slave have to add themselves as users to a session. A dsUser is the only way a process can interact with a session. One process may have multiple dsUsers to a single session. In the cfly implementation, each process has only one dsUser.
During the execution of cfly, the program has to receive DataSync events when other cluster nodes enter or leave the session. The program informs the DataSync server what events we wish to handle by calling the following function:
ViewState -> SessionUser -> handleEvent (session_events); |
On the master side, the program has to create all the DataSync shared components: a session-info block, shared-memory buffers, and barriers. The program allocates shared data IDs for these elements in the following code:
dsDataId session_data_id = ViewState -> SessionUser
                   ->alloc( DS_MEMORY, DS_PRESERVED );
ViewState -> SessionData -> data_pre = ViewState -> SessionUser
                   ->alloc( DS_MEMORY, DS_UNPRESERVED );
ViewState -> SessionData -> data_post = ViewState -> SessionUser
                   ->alloc( DS_MEMORY, DS_UNPRESERVED );
ViewState -> SessionData -> barrier_pre = ViewState -> SessionUser
                   ->alloc(DS_BARRIER, DS_UNPRESERVED);
ViewState -> SessionData -> barrier_post = ViewState -> SessionUser
                   ->alloc(DS_BARRIER, DS_UNPRESERVED);
|
The program only allocates these shared Data IDs on the master. The slaves receive these the IDs using a session-info block as described in the following paragraphs.
For barrier objects, the previous allocations are all that are needed. However, DataSync does not allocate any memory for memory objects. We have to attach a local memory buffer (allocated earlier by the application) to each shared data ID in order to enable sharing. The program does this in the following calls (on the master):
        ViewState -> SessionUser -> mapMemory(
                            ViewState -> SessionData -> data_pre,
                            0,
                            ClusterViewState_pre,
                            sizeof(ClusterSharedViewState_pre),
                            DS_WRONLY);
         ViewState -> SessionUser -> mapMemory(
                            ViewState -> SessionData -> data_post,
                            0,
                            ClusterViewState_post,
                            sizeof(ClusterSharedViewState_post),
                            DS_WRONLY);
        ClusterViewState_post -> exitFlag = 0;
        ViewState -> SessionUser -> mapMemory(
                            session_data_id,
                            0,
                            ViewState -> SessionData,
                            sizeof(ClusterSessionData),
                            DS_WRONLY );
|
On the slaves, the program maps the above shared memory blocks as read-only.
The only pre-defined shared memory block on the DataSync server is the session info. The master has to notify the slaves of its newly allocated shared data IDs by storing their IDs in the session info as follows:
session->putInfo( session_data_id ); |
Slaves can call dsSession::getInfo() to retrieve the shared data ID used for the session info and map a local memory block to it:
dsDataId cluster_data_id = session->getInfo();

ViewState -> SessionUser -> mapMemory(
          cluster_data_id,
          0,
          ViewState -> SessionData,
          sizeof(ClusterSessionData),
          DS_RDONLY|DS_COPY);
|
When done with its initialization, the master calls the following function:
session->realize(); |
All pending slaves continue running their initialization code.
The functions sendClusterViewState_pre() and sendClusterViewState_post() package portions of the ViewState structure and inform DataSync to propagate them to the slaves. This section will focus on sendClusterViewState_pre() because it is shorter.
As explained earlier, some members of ViewState are pointers to local objects; so, the program has to package them before sharing across a cluster. One such example is ViewState -> sceneDCS. The program cannot share its pointer over the cluster. Instead, the program calls the following function:
ViewState -> sceneDCS -> getMat(ClusterViewState_pre -> sceneDCS);
|
Once done packing all latency-critical members in ClusterViewState_pre, the program informs DataSync that the buffer is not clear:
ViewState -> SessionUser -> markMemory (
          ViewState -> SessionData ->data_pre,
          0,
          sizeof (ClusterSharedViewState_pre));
|
The program then makes DataSync propagate all marked buffers across the cluster as shown in the following:
ViewState -> SessionUser -> syncMemory(); |
DataSync does not have any API for receiving data. The local memory blocks that each slave creates are updated transparently. Slaves can assume that their input buffers are up-to-date and process them. The cfly slaves unpack input buffers into ViewState and make the necessary changes in the displayed GUI.
In order to force synchronization between the master and the slaves, each joins two barriers each frame. The master joins barriers right after calling dsUser::syncMemory(). The slaves join the same barriers before reading their shared memory copies. This ensures that slaves do not run too fast and process the same shared memory before the master finished updating it. It also ensures that slaves do not run too slow and miss complete updates of their shared memory.
Joining a barrier requires knowing its shared data ID and the number of users that should also join this barrier. The following call joins a barrier:
ViewState -> SessionUser -> barrier (
          ViewState -> SessionData -> barrier_pre,
          ViewState -> numUsers);
|
In order to maintain an up-to-date count on the number of users in a session, the program makes the following calls:
dsDirectory *dir = (dsDirectory *)
                   (ViewState -> ClusterSession -> directory());
ViewState -> numUsers = dir -> size();
|
The function queryClusterRank() computes the size of a cluster and the relative position of the current node in the cluster.
The program cfly uses shared memory to share the contents of ViewState. Another possible approach would send messages every time some value changes in the ViewState structure.
Advantages for shared memory approach
Much simpler. The application looks more like a multipipe Onyx application.
Any cluster node that joins the session late sees the full contents of ViewState. There is no need to request updates from one of the nodes.
Advantage for message passing
When users do not make many GUI selections, there is less traffic on the network. The application only has to send camera position and the position of moving models every frame.