The Duo upgrade enables you to use a second monitor, keyboard, and mouse. This chapter tells you how to set up these peripherals, reconnect all the cables, and power on.
Tasks in this chapter include
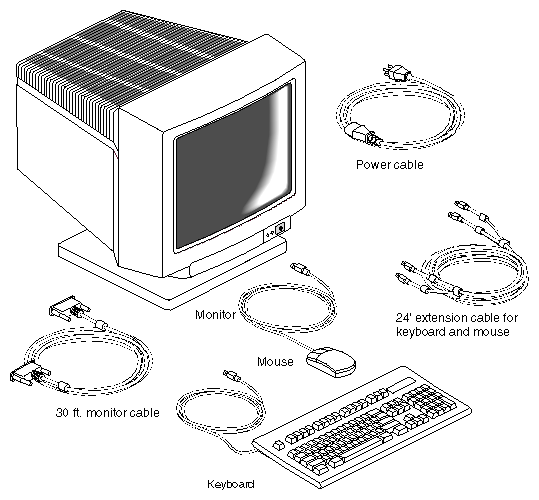
The monitor ships with two cables: a monitor power cable and a monitor/workstation cable.
Unpack the secondary monitor in the work area designed for the secondary user.
 | Caution: The monitor is very heavy. Have someone help you lift it out of the box. |
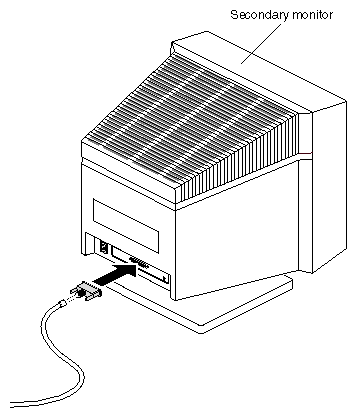
Connect one end of the extra-long monitor/workstation cable to the connector on the back of the secondary monitor. Connect and tighten the thumbscrews on both sides of the connector.
Reconnect the cable to the back of the primary monitor, if you disconnected it.
The next two sections provide instructions on connecting the graphics boards to the correct monitor. To determine which graphics board is in the primary graphics board position (slot A or slots D and A), look at Figure 7-4 and Figure 7-5.
 | Note: It's important that you connect the primary monitor cable to the correct monitor connector on the XIO module. |
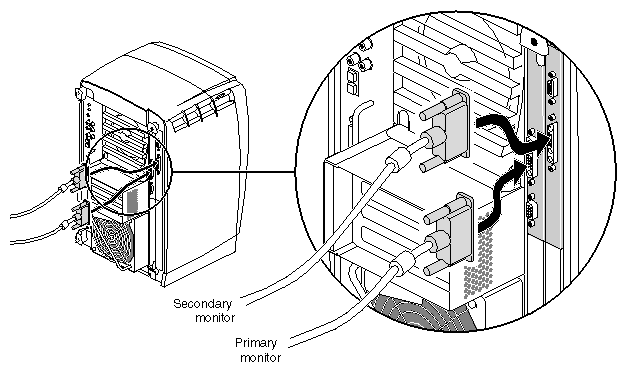
Connect the primary monitor cable to the primary graphics board in slot A, toward the top and interior of the OCTANE workstation.
Connect the extra-long, secondary monitor cable to the secondary graphics board in slot B, or possibly slot C. For illustration purposes, the secondary graphics board is shown in slot B.
Tighten the thumbscrews on both sides of the connectors.
You are finished connecting the monitor/workstation cables. Go to “Connecting the System Module and PCI Cables”.
Figure 7-4. Connecting Monitor Cables in an OCTANE/SSI or /SSE/SI or /SE, or OCTANE/MXI or /MXE/SI or /SE Configuration
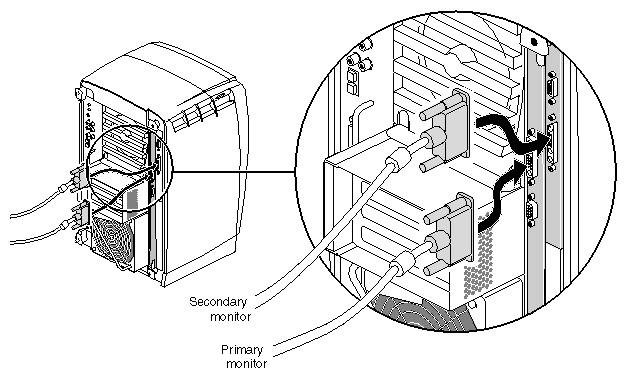
Connect the primary monitor cable to the primary graphics board in slot A (and D), toward interior of the OCTANE workstation.
Connect the extra-long, secondary monitor cable to the secondary graphics board in slot B or possibly slot C. For illustration purposes, the secondary graphics board is shown in slot B.
Tighten the thumbscrews on both sides of the connectors.
You are finished connecting the monitor/workstation cables. Go to “Connecting the System Module and PCI Cables”.
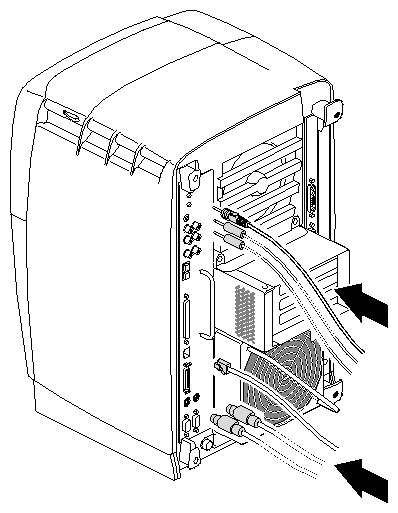
Connect all the cables to the system module that you removed.
Note: The keyboard and mouse ports on the system module are interchangeable. Either port will work for either device. However, you must connect them when the system is powered off. See Appendix A, for an illustration of the labeled ports on the back of the workstation.
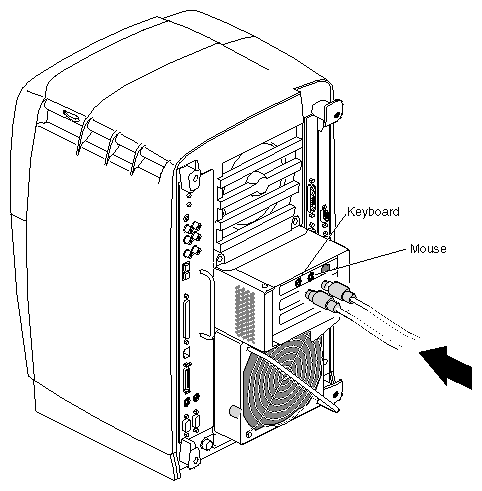
Connect the extra-long keyboard and mouse cables to the PCI board in the PCI module. (If you are using the Ethernet port on the PCI board, connect that cable as well.)

Tip: When you are plugging the mouse and keyboard cables into the PCI board ports, firmly seat the cables as they may be a tight fit. Connect the other end of the keyboard and mouse cables to the keyboard and mouse in the secondary user location.
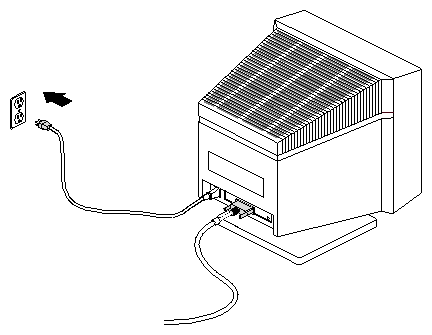
Connect the power cable for each monitor as follows:
Connect the female end of the power cable to the power connector on the back of each monitor.
Plug the male end into a three-prong grounded electrical outlet.
Turn on the primary monitor and then the secondary monitor. The power switch is on the front of the monitor in the lower right corner. The LED on the switch lights up when the monitor is powered on.
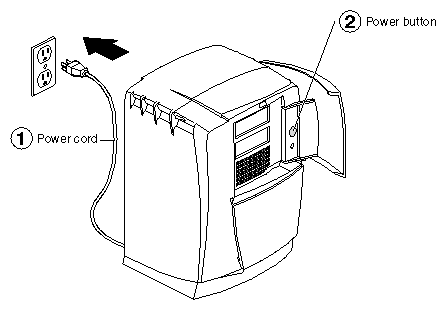
Be sure to turn both monitors on before turning on the OCTANE workstation.
Plug the OCTANE power cord into an electrical outlet.
Push the power button on the front of the OCTANE workstation.
| Note: Start-up diagnostics display to the primary head only. |
You are finished installing the secondary monitor, reconnecting the primary monitor, and connecting all cables.
Go to Chapter 8 for instructions on your next tasks: configuring the system and verifying the hardware installations.