This chapter discusses the following::
You can view the system status in the following ways:
Query the status of an individual node or the cluster by using the GUI or cxfs_admin.
Keep continuous watch on the state of a cluster using the GUI view area or the following cxfs_admin command:
# /usr/cluster/bin/cxfs_admin [-i clustername] -r -c "status interval=seconds"

Note: If you have multiple clusters connected to the same public network, use the -i option to identify the cluster name. Use the CXFS GUI or the tail command to view the end of the /var/log/messages system log file on a server-capable administration node.
View the system log file on client-only nodes.
Manually test the filesystems with the ls command.
Use Performance Co-Pilot™ to monitor the read/write throughput and I/O load distribution across all disks and for all nodes in the cluster. The activity can be visualized, used to generate alarms, or archived for later analysis. You can also monitor XVM statistics.
See the following:
Performance Co-Pilot for Linux User's and Administrator's Guide
Performance Co-Pilot for Linux Programmer's Guide
dkvis(1), pmie(1), pmieconf(1), and pmlogger(1) man pages
Note: Administrative tasks must be performed using one of the following
tools:
|
You should monitor the following for problems:
Server-capable administration node log: /var/log/messages (look for a Membership delivered message to indicate that a cluster was formed)
Events from the GUI: /var/log/cxfs/cad_log
Kernel status (from clconfd): /var/log/cxfs/clconfd_hostname
Command line interface log: /var/log/cxfs/cli_ hostname
Monitoring of other daemons: /var/log/cxfs/cmond_log
Reset daemon log: /var/log/cxfs/crsd_ hostname
Output of the diagnostic tools such as the network connectivity tests: /var/log/cxfs/diags_hostname
Cluster database membership status: /var/log/cxfs/fs2d_log
System administration log: /var/lib/sysadm/salog (contains a list of the commands run by the GUI)
For information about client-only nodes, see CXFS 7 Client-Only Guide for SGI InfiniteStorage.
You can monitor system status with the following tools:
Also see “Key to Icons and States” in Chapter 10.
You can monitor the status of the cluster, individual nodes, and CXFS filesystems by using the CXFS GUI connected to a server-capable administration node. For complete details about the GUI, see Chapter 10, “CXFS GUI”.
The easiest way to keep a continuous watch on the state of a cluster is to use the GUI view area and choose the following:
Edit -> Expand All
The cluster status can be one of the following:
ACTIVE, which means the cluster is up and running.
INACTIVE, which means that CXFS services have not been started.
ERROR, which means that some nodes are in a DOWN state; that is, the cluster should be running, but it is not.
UNKNOWN, which means that the state cannot be determined because CXFS services are not running on the node performing the query.
To query the status of a node, you provide the logical name of the node. The node status can be one of the following:
UP, which means that CXFS services are started and the node is part of the CXFS kernel membership.
DOWN, which means that although CXFS services are started and the node is defined as part of the cluster, the node is not in the current CXFS kernel membership.
INACTIVE, which means that CXFS services have not been started
UNKNOWN, which means that the state cannot be determined because CXFS services are not running on the node performing the query.
State information is exchanged by daemons that run only when CXFS services are started. A given server-capable administration node must be running CXFS services in order to report status on other nodes.
For example, CXFS services must be started on node1 in order for it to show the status of node2. If CXFS services are started on node1, then it will accurately report the state of all other nodes in the cluster. However, if node1's CXFS services are not started, it will report the following states:
INACTIVE for its own state, because it can determine that the start CXFS services task has not been run
UNKNOWN as the state of all other nodes, because the daemons required to exchange information with other nodes are not running, and therefore state cannot be determined
You can use the view area to monitor the status of the nodes. Select View: Nodes and Cluster.
You can monitor the status of the cluster, individual nodes, and CXFS filesystems by using the cxfs_admin command on any host that has monitor access permission for the CXFS cluster database. For complete details about cxfs_admin , see Chapter 11, “cxfs_admin Command”.
For example:
To query node and cluster status, use the following cxfs_admin command on any host that has monitor access to the CXFS cluster database:
status
For more information about monitor access, see “Setting cxfs_admin Access Permissions” in Chapter 11.
To continuously redisplay an updated status, enter an interval in seconds:
status interval=seconds
For example, to redisplay every 8 seconds:
cxfs_admin:mycluster> status interval=8
To stop the updates, send an interrupt signal (usually Ctrl+C).
The most common states for nodes include:
| Disabled: The node is not allowed to join the cluster |
| Inactive: The node is not in cluster membership |
| Stable: The node is in membership and has mounted all of its filesystems |
A node can have other transient states, such as Establishing membership.
The most common states for filesystems include:
| Mounted: All enabled nodes have mounted the filesystem |
| Unmounted: All nodes have unmounted the filesystem |
The cluster can have one of the following states:
| Stable |
| node(s) not stable |
| filesystem(s) not stable |
| node(s), filesystem(s) not stable |
Any other state not mentioned above requires attention by the administrator.
For example (a * character indicates a server-capable administration node):
cxfs_admin:clusterOne (read only) > status Event at [ Oct 22 13:08:07 ] Cluster : clusterOne Tiebreaker : Client Licenses : allocated 2 of 5 ------------------ -------- -------- ------------------------------------------------------------------------------- Node Cell ID Age Status ------------------ -------- -------- ------------------------------------------------------------------------------- bert * 0 4 Mounted 1 of 2 filesystems cxfsxe5 * 1 3 Stable cxfsxe10 3 - Disabled penguin17 4 0 Establishing membership pg-27 5 0 Establishing membership ------------------ ------------------ ------------------------------------------------------------------------------- Filesystem Server Status ------------------ ------------------ ------------------------------------------------------------------------------- zj01s0 cxfsxe5 1 of 5 nodes mounted, bert trying to mount zj01s1 bert Mounted [2 of 5 nodes] ------------------ ---------- -------------------------------------------------------------------------------- Switch Port Count Known Fenced Ports ------------------ ---------- -------------------------------------------------------------------------------- brocade26cp1 192 4, 20, 21, 132, 223 |
| Note: A filesystem name that is longer than 18 characters will be truncated in the status output. To display the entire filesystem name, use the show command. See “Show a CXFS Filesystem” in Chapter 11. |
You can monitor the status of the cluster, individual nodes, and CXFS filesystems by using the cxfs_info command on a stable client-only node. The path to cxfs_info varies by platform.
The cxfs_info command provides information about the cluster status, node status, and filesystem status. cxfs_info is run from a client-only node.
You can use the -e option to display information continuously, updating the screen when new information is available; use the -c option to clear the screen between updates. For less verbose output, use the -q (quiet) option.
For example, on a Linux client-only node named pg-27:
pg-27% /usr/cluster/bin/cxfs_info
cxfs_client status [timestamp Oct 22 12:45:55 / generation 5645836]

CXFS client:
    state: reconfigure (5), cms: quiesce, xvm: down, fs: down
Cluster:
    clusterOne (9) - enabled
Local:
    pg-27 (5) - enabled
Servers:
    bert       enabled  DOWN  0
    cxfsxe5    enabled  DOWN  1
Nodes:
    cxfsxe10   disabled DOWN  3
    penguin17  enabled  DOWN  4
    pg-27      enabled  DOWN  5
Filesystems:
    zj01s0
zj01s1 |
You can monitor the status of the cluster, individual nodes, and CXFS filesystems by using the clconf_info command on a server-capable administration node, assuming that the cluster is up.
The clconf_info command has the following options:
| -e | Waits for events from clconfd and displays the new information |
| -n nodename | Displays information for the specified logical node name |
| -p | Persists until the membership is formed |
| -q | (Quiet mode) Decreases verbosity of output. You can repeat this option to increase the level of quiet; that is, -qq specifies more quiet (less output) than -q. |
| -s | Sorts the output alphabetically by name for nodes and by device for filesystems. By default, the output is not sorted. |
| -v | (Verbose mode) Specifies the verbosity of output ( -vv specifies more verbosity than -v). The default output for clconf_info is the maximum verbosity. |
For example:
cxfsxe5:~ # /usr/cluster/bin/clconf_info Event at [2009-10-22 13:12:41] Membership since Thu Oct 22 13:12:41 2009 ________________ ______ ________ ______ ______ Node NodeID Status Age CellID ________________ ______ ________ ______ ______ cxfsxe5 1 up 3 1 bert 3 Disabled - 0 pg-27 4 Disabled - 5 penguin17 5 Disabled - 4 cxfsxe10 6 Inactive - 3 ________________ ______ ________ ______ ______ 2 CXFS FileSystems /dev/cxvm/zj01s1 on /mnt/zj01s1 enabled server=(cxfsxe5) 0 client(s)=() status=UP /dev/cxvm/zj01s0 on /mnt/zj01s0 enabled server=(cxfsxe5) 0 client(s)=() status=UP |
This command displays the following fields:
Node is the node name.
NodeID is the node identification number.
Status is the status of the node, which may be up, Inactive, or Disabled.
Age indicates how many membership transitions in which the node has participated. The age is 1 the first time a node joins the membership and will increment for each time the membership changes. This number is dynamically allocated by the CXFS software (the user does not define the age).
CellID is the cell identification number, which is allocated when a node is added into the cluster definition with the GUI or cxfs_admin. It persists until the node is removed from the cluster. The kernel also reports the cell ID in console messages.
You can also use the clconf_info command to monitor the status of the nodes in the cluster. It uses the same node states as the CXFS GUI. See “CXFS GUI and Status”.
To check the current fencing status, do one of the following:
Select View: Switches in the GUI view area
Use the show switch command within cxfs_admin
Use the show fencing command within cxfs_admin to show a summary of the fencing status per node
Use the query fence command within cxfs_admin (when cxfs_admin is executed directly on a server-capable administration node) to show fencing details
Use the hafence command as follows:
/usr/cluster/bin/hafence -q
For example, the following output shows that all nodes are enabled:
cxfs_admin:clusterOne > show fencing
Event at [ Jan 28 14:18:05 ]
node:bert:status:fencing=Stable
node:cxfsxe5:status:fencing=Stable
node:cxfsxe10:status:fencing=Stable
node:penguin17:status:fencing=Stable
node:pg-27:status:fencing=Stable


cxfs_admin:clusterOne > query fence
Event at [ Jan 28 14:18:22 ]
Waiting for shell command to end
  Switch[0] "brocade26cp0" has 256 ports
    Port 41 type=FABRIC status=enabled hba=210000e08b1a07d8 on host penguin17
    Port 62 type=FABRIC status=enabled hba=100000062b126ff9 on host bert
    Port 167 type=FABRIC status=enabled hba=210000e08b123d95 on host cxfsxe5
    Port 170 type=FABRIC status=enabled hba=210000e08b1284c6 on host pg-27
    Port 201 type=FABRIC status=enabled hba=100000062b115f35 on host cxfsxe10
Operation completed successfully |
A status of enabled for an UNKNOWN host indicates that the port is connected to a system that is not a node in the cluster. A status of disabled for an UNKNOWN host indicates that the node has been fenced (disabled), and the port may or may not be connected to a node in the cluster. A status of enabled with a specific name host indicates that the port is not fenced and is connected to the specified node in the cluster.
For example, the following hafence verbose ( -v) output shows that port 4 is fenced (output truncated):
cxfsxe5:~ # /usr/cluster/bin/hafence -v
  Switch[0] "brocade26cp1" has 192 ports
    Port 0 type=FABRIC status=enabled hba=100000062b117c8c on host UNKNOWN
    Port 1 type=FABRIC status=enabled hba=100000062b117954 on host UNKNOWN
    Port 2 type=FABRIC status=enabled hba=100000062b117c7c on host UNKNOWN
    Port 3 type=FABRIC status=enabled hba=100000062b11796c on host UNKNOWN
    Port 4 type=FABRIC status=disabled hba=100000062b117ff0 on host UNKNOWN
    Port 5 type=FABRIC status=enabled hba=100000062b117958 on host UNKNOWN
Port 6 type=FABRIC status=enabled hba=100000062b117f60 on host UNKNOWN.... |
To check current fail policy settings, use the show failpolicy command in cxfs_admin, the node information in the GUI, or the cms_failconf command as follows:
# /usr/cluster/bin/cms_failconf -q |
For example:
cxfsxe5:~ # /usr/cluster/bin/cms_failconf -q

CMS failure configuration:
        cell[0] bert     Reset
        cell[1] cxfsxe5  Reset
        cell[3] cxfsxe10         Fence Shutdown
        cell[4] penguin17        Fence Shutdown
cell[5] pg-27 Fence Shutdown |
You can use Performance Co-Pilot to monitor XVM statistics. To do this, you must enable the collection of statistics by using the pmstore command:
To enable the collection of statistics for the local host, enter the following:
# pmstore xvm.control.stats_on 1
To disable the collection of statistics for the local host, enter the following:
# pmstore xvm.control.stats_on 0
You can gather XVM statistics in the following ways:
By using the pmdumptext command to produce an ASCII report of selected metrics from the xvm group in the Performance Co-Pilot namespace of available metrics.
By using the pmgxvm command to monitor read and write activity at each XVM node.
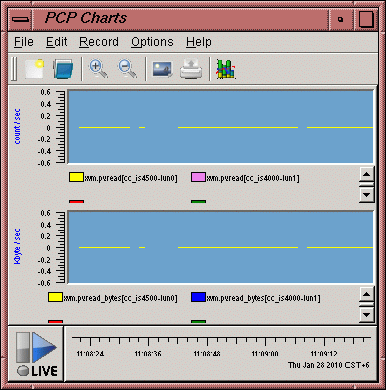
By using the pmchart command to view time-series data in the form of a moving graph.Figure 14-1 shows an example.