This guide explains how to upgrade your Octane power supply for VPro graphics.
 | Caution: You must install your new power supply before you perform the VPro graphics upgrade. |
This guide shows you how to remove your current power supply and install the required replacement for VPro graphics. The Octane power supply is located at the bottom of your workstation and you do not have to open the chassis to remove it. If your workstation has a PCI module installed, you have to remove it before you can upgrade your power supply.
The following topics are covered:
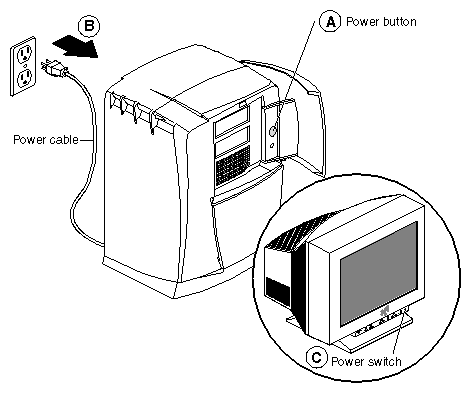
Open the cover and push the power button (See A in Figure 1) to power off your workstation.
Unplug the power cable (B) from the electrical socket.
Press the monitor power switch (C) to power off your monitor.
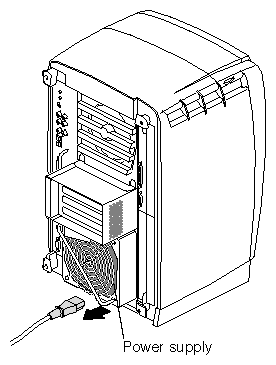
Unplug the power cable from the back of your workstation (power supply), as shown in Figure 2.
Before you proceed to the next section, wait until the power supply fan stops spinning and you cannot feel any air coming out of the power supply.
If a PCI module is not installed in your workstation, skip to the next section and follow the instructions for removing your power supply.
If a PCI module is installed in your workstation, you must remove it before you can remove the power supply. Follow the directions below to remove the PCI module, and then see the next section to upgrade your power supply.
| Caution: The components inside your workstation are extremely sensitive to static electricity; you must wear the wrist strap while removing and reinstalling the PCI module. |
Attach the wrist strap.
Unroll the first two folds of the band.
Wrap the exposed adhesive side firmly around your wrist, unroll the rest of the band, then peel the liner from the copper foil at the opposite end.
Attach the copper foil to any exposed electrical ground, such as a metal part of your workstation.
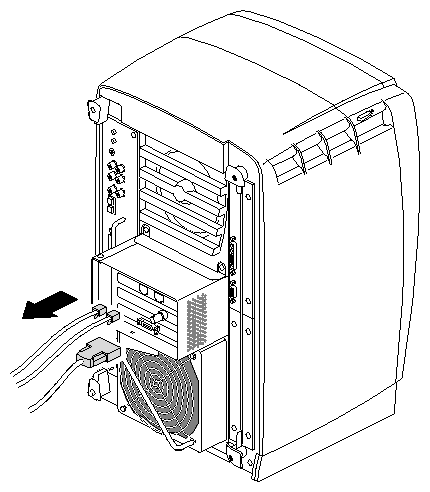
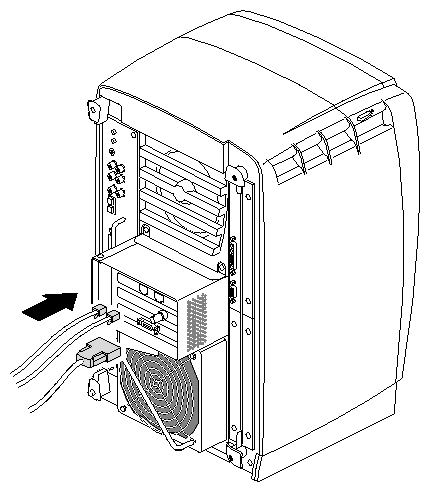
Remove any cables from the PCI module, as shown in Figure 3.
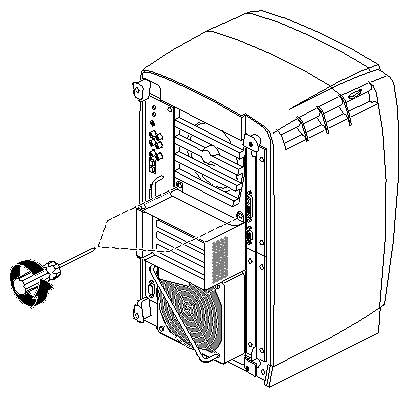
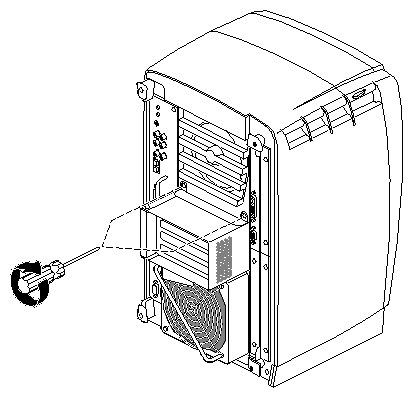
Loosen the two captive screws that secure the PCI module to the workstation until they are disconnected from the chassis, as shown in Figure 4.
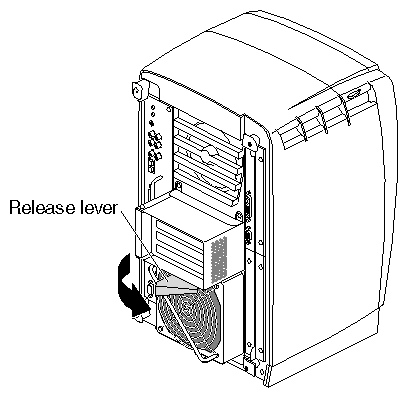
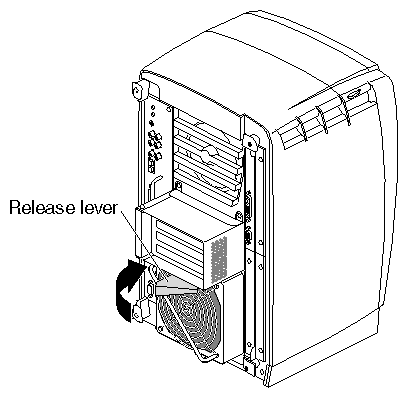
Pull the release lever toward you and to the right, as shown in Figure 5.
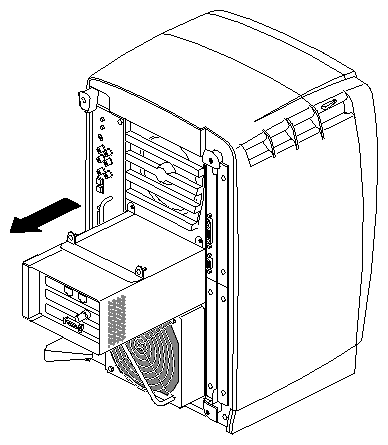
Remove the PCI module by sliding it out of the workstation, as shown in Figure 6, then place it on a dry, antistatic surface, such as your desktop.
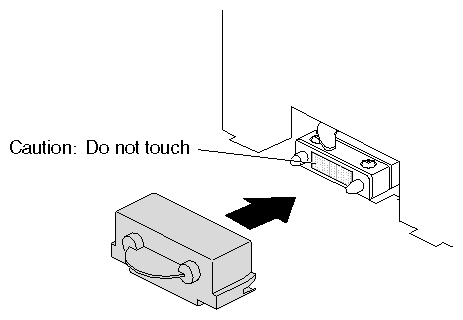
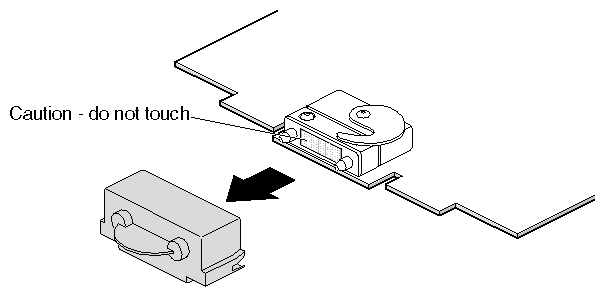
| Caution: The compression connector on the back of the PCI module is delicate and easily damaged. Do not touch or bump the gold area of the compression connector (see Figure 7). For more information about compression connectors, see Appendix B in your Octane Owner's Guide. |
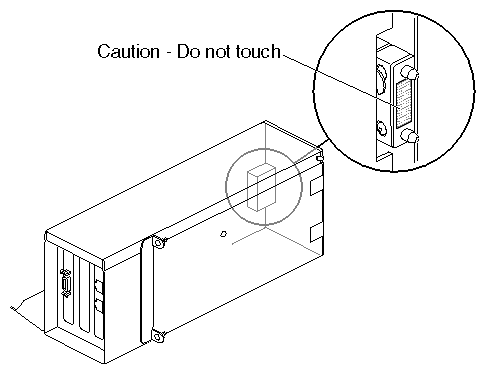
Place a cap on the compression connector on the back of the PCI module, as shown in Figure 8. (Compression connector caps are included with the workstation.)
If you did not power off your workstation, unplug the power cable from the electrical outlet and your workstation, and power off your monitor, do it now. You do not have to wear the wrist strap to remove the power supply.
 | Warning: Make sure the power cable is disconnected from the electrical socket and your workstation (power supply) before you begin this procedure. |
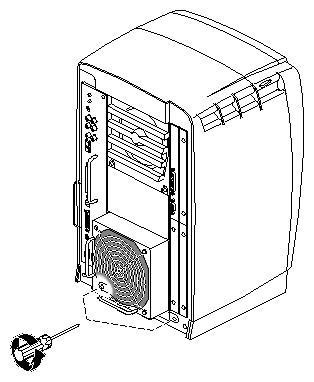
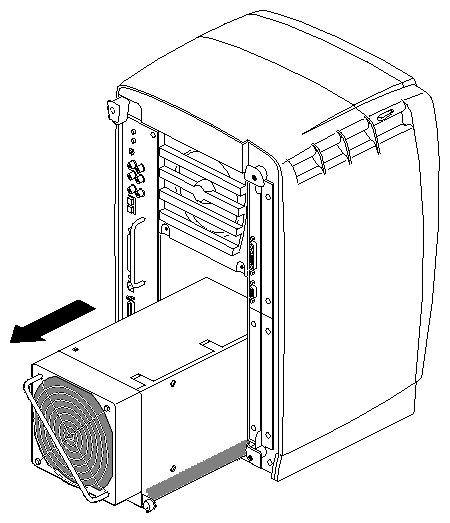
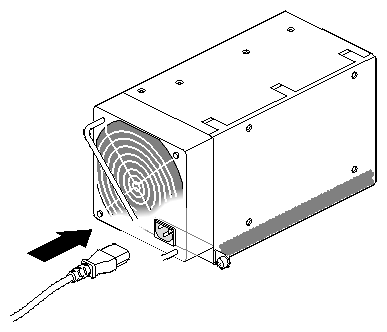
Follow these steps to install the new power supply:
Tilt the new power supply upward and plug in the power cable, as shown in
Figure 11.
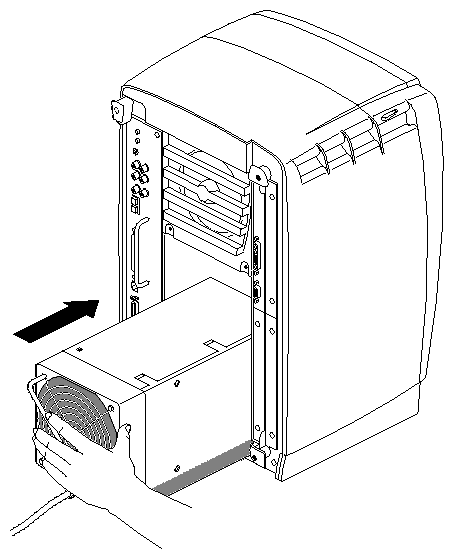
Slide the new power supply into your workstation, as shown in Figure 12.
Push on the power supply to firmly connect it to the frontplane.

Note: Be sure the tabs (holding the screws) on the power supply are flush with the chassis.
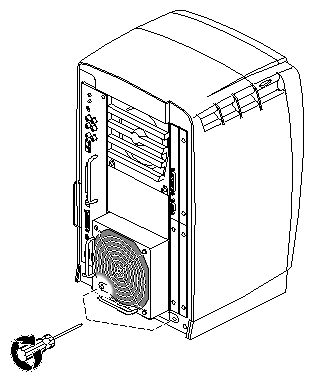
Tighten the screws that attach the power supply to the workstation, as shown in Figure 13.
You are finished installing the new power supply.
If you removed the PCI module, reinstall it now by following the instructions in the next section.
If you are not reinstalling the PCI module, plug the power cable into an electrical outlet, press the power button on your workstation and then press the power switch on your monitor.
Remove the cap from the compression connector on the back of the PCI module, as shown in Figure 14, and save it for future use.
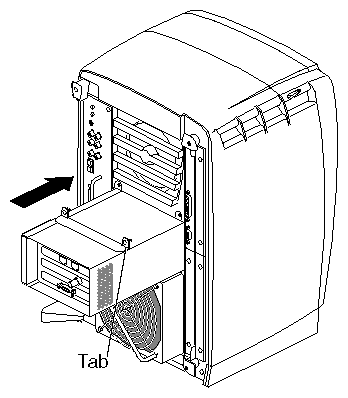
Insert the PCI module into your workstation, as shown in Figure 15, and then push it until the tabs are flush with the chassis.
Close the release lever by pushing it to the left until it is parallel with the PCI module, as shown in Figure 16.
Tighten the captive screws that secure the PCI module to the workstation, as shown in Figure 17.
Reconnect any PCI cables to the PCI connectors, as shown in Figure 18.
Plug the power cable into an electrical outlet, press the power button on your workstation, and then press the power switch on your monitor.
Remove the wrist strap.
You are finished upgrading your power supply for VPro graphics.
See the next section to verify your power supply upgrade.
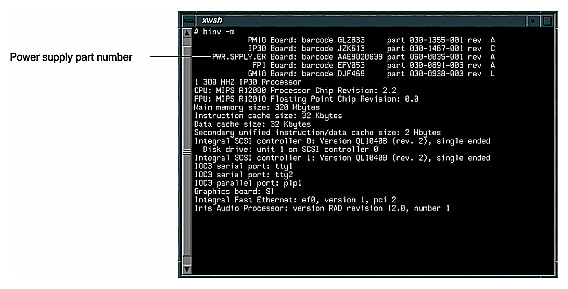
Check your power supply by entering hinv -m in a command line window.
The hardware inventory list appears, as shown in the example in Figure 19.
Verify the following information in the third line of the hardware inventory list:
The part number for PWR.SPPLY.ER must be: 060-0035-00x or later, where x = 1 or higher, as shown in the example in Figure 19.
If the correct part number is displayed, begin the VPro graphics upgrade, as described in your Octane Workstation VPro Graphics Upgrade Kit Installation Guide.
If the correct part number is not displayed for PWR.SPPLY.ER, contact your authorized SGI sales representative.