This flier provides additional information for installing the cable guard on the Octane Personal Video Board. Use this flier instead of the instructions in the Octane Personal Video Installation Guide, Chapter 1, “Installing the Cable Guard,” pages 19 through 23.
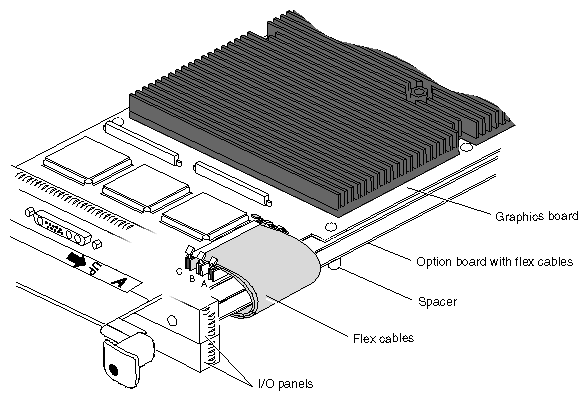
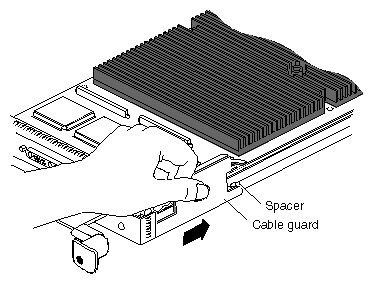
The cable guard protects the flex cables from being scratched or caught when the XIO module is inserted or removed from the workstation. It slides under the I/O panels and attaches beneath the screw on the graphics board and behind the spacer on the option board.
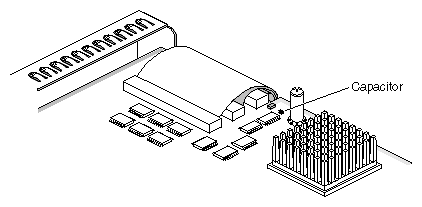
Turn the XIO module so that the Personal Video board is facing up.
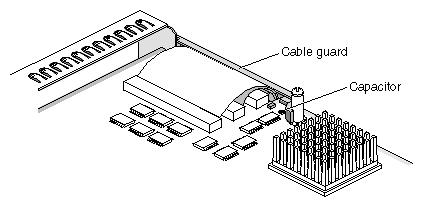
Check the location of a small capacitor near the spacer. The cable guard has been designed to clear the capacitor, but take care when placing the cable guard half-hook behind the spacer.
Turn the XIO module over, so that the graphics board is facing up.
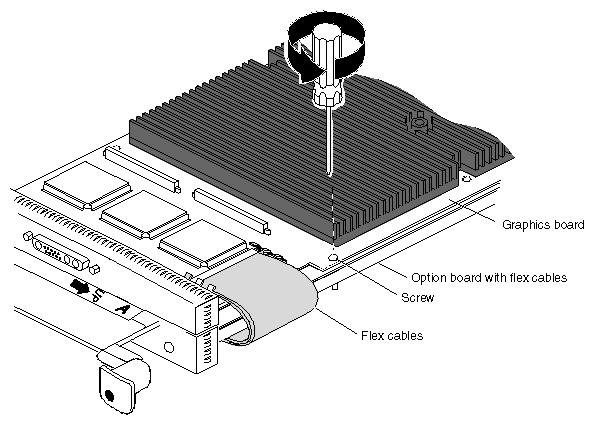
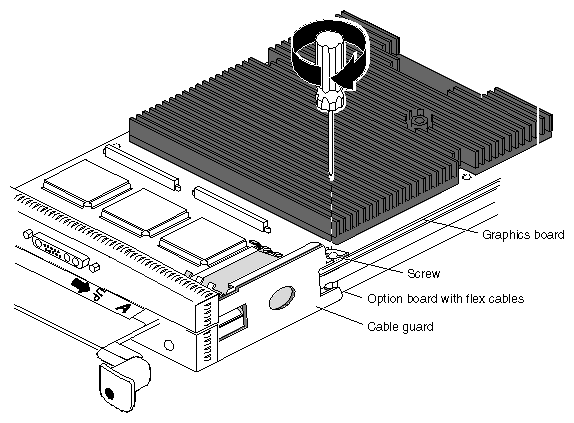
Remove the screw from the graphics board, as shown in Figure 3.
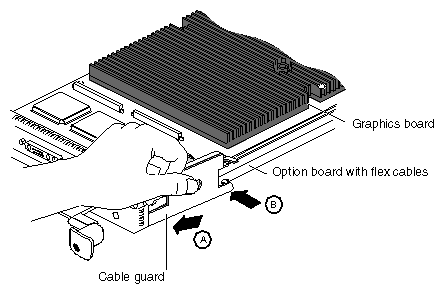
Slide the two prongs under the I/O panels.
Push the cable guard toward the flex cables (A), laying the top hook on the top of the graphics board (B). Continue placing pressure on the flex cables.
Press down on the center hole of the cable guard and slide it toward the back of the XIO module until its half-hook rests behind the spacer on the option board. Take care not to bump the capacitor.
Place the screw from the graphics board through the top hook on the cable guard and the graphics board, and into the standoff on the XIO module. Then tighten it.

Note: If you received a screw with the cable guard, use this longer screw instead of the screw you just removed from the graphics board. You have finished installing the cable guard.
Remove the caps from all XIO compression connectors. Keep the caps to protect the compression connector should you ever remove any XIO board.
Continue with the installation instructions in the Octane Personal Video Installation Guide, Chapter 1, “Replacing the XIO Module” on page 24.