Movie Convert is a tool that lets you manipulate images and movies. It's designed for people who work extensively with images and movie files and often need to convert them from one format to another. You can:
convert images from one format to another
resize or crop images
convert a group of numbered images into a movie file
convert a movie file into a group of separate images
convert a movie file from one format to another
choose a compression scheme for a movie
You can use Movie Convert to change an image or series of images from one file format to another. This section contains:
You can use Movie Convert to change the file format of an image. To do so:
If Movie Convert isn't already running, open it now by clicking the words Movie Convert .
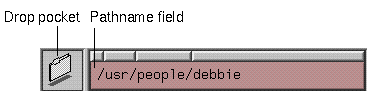
The Movie Convert window appears. In the upper left corner, you see a drop pocket and a pathname field. See Figure 3-1.
Specify the name of the image file you want to convert.
Type the name of the image file in the pathname field, then press <Enter>.
Or, find the file icon and place it in the drop pocket.
Now the pathname field displays the full name of the image. For example, if you're going to convert a file named beast.rgb in the /usr/tmp directory, the pathname field shows /usr/tmp/beast.rgb.
If it is not already selected, click Single image to specify that you want to change the format of a single image.
A blue triangle indicates it's selected.
If necessary, select a format from the Input format list.
If Movie Convert can determine the format of the image, it highlights that format in black. If Movie Convert can't identify the image type, or it selects an incorrect format, select a format from the list.
Make sure Images is selected as the output media.
The right side of the window shows all of the output options. At the top, you see controls that let you choose whether you want to end up with image files or a movie file. Click Images. A blue triangle indicates it is selected.
Click on a format in the scrolling list labeled “Output format.”
This determines how the file will be converted. The selection is highlighted black when it's selected. See also “An Explanation of Input and Output Formats.” It provides a brief description of each abbreviation on the list.
Also, if you want to resize the image, see “Resizing Images Using Movie Convert.”
Specify the directory and file name for the image you're creating.
In the lower right corner of the window, you see a Directory field and a File template field.
In the Directory field, type the name of the directory in which you want the converted image to be stored.
In the File template field, type the name of the file. Movie Convert uses the filename suffix to determine the output format. For example, if you type img.gif, Movie Convert automatically resets the output format to gif.
Click the Start button to convert the file.
If you have a directory that contains a group of numbered images, all of the same file format, you can use Movie Convert to change the file format of all the files.
If Movie Convert isn't already running, open it now by clicking the words Movie Convert .
The Movie Convert window appears. In the upper left corner, you see a drop pocket and a pathname field. See Figure 3-2.
Specify the name of the directory that contains the numbered images you want to convert.
Type the name of the directory in the pathname field, then press <Enter>.
Or, find the folder icon for that directory and place it in the drop pocket.
Now the pathname field displays the directory name.
Click Numbered images to signal that you are working with a collection of images.
A blue triangle indicates it's selected. In addition, a new set of controls appears in the lower left portion of the window.
Select the appropriate format from the scrolling list labeled “Input format.”
Movie Convert can only convert a group of files that share the same file format. Choose the correct format from the list. See “An Explanation of Input and Output Formats” for a description of each abbreviation.
In the field labeled File template, type the name of the files you want to convert.
For example, if you have files named img1.rgb through img20.rgb, type the following in the field: img#.rgb. If you have files named img000.gif through img100.gif, type: img###.gif.
Use the Start, End, and Step fields to specify which numbered images to grab.
For example, suppose you have numbered images ranging from img1.rgb to img30.rgb and you want to convert the first five images. In this case, you type 1 in the Start field, 5 in the end field, and 1 in the step field. If you have 30 images and want to convert every other one, type 1 in the Start field, 30 in the end field, and 2 in the step field.
Make sure Images is selected as the output media.
The right side of the window shows all of the output options. At the top, you see controls that let you choose whether you want to end up with image files or a movie file. Click Images. A blue triangle indicates it is selected.
Click on a format in the scrolling list labeled “Output format.”
This determines how the file will be converted. The selection is highlighted black when it's selected. See also “An Explanation of Input and Output Formats.”
Also, if you want to resize the image, see “Resizing Images Using Movie Convert.”
Specify the directory and file name for the images you're creating.
In the lower right portion of the window, you see a Directory field and a File template field.
In the Directory field, type the name of the directory in which you want the converted image to be stored.
In the File template field, type the template you want Movie Convert to use when naming these images.
By default, the field displays newimage. You must add a # sign to this name or you will end up with one file named newimage. For example, type newimage# if you want the images to be named newimg0, newimg1, newimg2, etc....

Note: Movie Convert uses the filename suffix to determine the output format. If you include a suffix, Movie Convert automatically resets the output format. For example, type img#.gif and Movie Convert resets the output format to gif. In the fields labeled Start and Increment by, choose the numbering scheme you want Movie Convert to use.
By default, Movie Convert starts numbering files with 0 and adds 1 for each new file.
Click the Start button to convert the file.
You can use Movie Convert to resize images as well as change their file format. This feature is most useful if you want to change the size of a large group of numbered images or frames in a movie. If you want to resize one or several images, and your image is in the SGI, TIFF or FIT file format, consider using Image Works to resize your images. To start this program, click the words Image Works now.
To resize images using Movie Convert:
If Movie Convert isn't already running, open it now by clicking the words Movie Convert .
The Movie Convert window appears. In the upper left corner, you see a drop pocket and a pathname field. See Figure 3-3.
Specify the name of the directory that contains the images you want to resize.
Type the name of the directory in the pathname field, then press <Enter>.
Or, find the folder icon for that directory and place it in the drop pocket.
Now the pathname field displays the directory name.
Click Numbered images to signal that you are working with a collection of images.
A blue triangle indicates it's selected. In addition, a new set of controls appears in the lower left corner of the window.
Select the appropriate format from the scrolling list labeled “Input format.”
Movie Convert can only resize a group of files that share the same format. Choose the correct format from the list. See “An Explanation of Input and Output Formats” for a description of each abbreviation.
In the field labeled File template, type the name of the files you want to resize.
For example, if you have files named img1.rgb through img20.rgb, type the following in the field: img#.rgb. If you have files named img000.gif through img100.gif, type: img###.gif.
Use the Start, End, and Step fields to specify which images to resize.
For example, suppose you have numbered images ranging from img1.rgb to img30.rgb and you want to resize the first five images. In this case, you type 1 in the Start field, 5 in the end field, and 1 in the step field. If you have 30 images and want to resize every other one, type 1 in the Start field, 30 in the end field, and 2 in the step field.
Make sure Images is selected as the output media.
The right side of the window shows all of the output options. At the top, you see controls that let you choose whether you want to end up with image files or a movie file. Click Images. A blue triangle indicates it is selected.
Choose a setting under the “Resize method” label.
Click Scale to size to shrink or enlarge the entire image.
Click Crop/poster to size to cut the image to a specified size or enlarge the image by surrounding it with black. When you crop an image, you don't interactively select the area you want to crop. Movie Convert uses the center of the image as the basis for the crop measurements.

Tip: If you want to interactively choose the crop area for a single image, and your image is in the SGI, TIFF, or FIT file format, use the tool Image Works. Open it by clicking the words Image Works now.
Choose a setting under the Aspect ratio label.
Click Original to preserve the aspect ratio of the original image.
Click 4:3 to enforce an aspect ratio of four to three. This is the aspect ratio of NTSC video.
Click Free if you want to choose a particular size, regardless of aspect ratio.
Enter numbers in the Width and Height fields.
By default, Movie Convert shows the size, in pixels, of the original image. If you're resizing multiple images, the Width and Height fields show the size of the first image in the sequence.
If you've opted to preserve the original ratio or a four-to-three ratio, you'll notice that changing the value in one field automatically causes the other field to update.
If you want to convert the image to a different file format, click on a format in the scrolling list labeled “Output format.”
If you want to preserve the original format, make sure the input and output formats match.
Specify the directory and file name for the image you're creating.
In the lower right portion of the window, you see a Directory field and a File template field.
In the Directory field, type the name of the directory in which you want the converted images to be stored.
In the File template field, type the template you want Movie Convert to use when naming these images.
By default, the field displays newimage. If you are resizing multiple images, you must add a # sign to this name or you will end up with one file named newimage. For example, type newimage# if you want the images to be named newimg0, newimg1, newimg2, etc....
Note: Movie Convert uses the filename suffix to determine the output format. If you include a suffix, Movie Convert automatically resets the output format. For example, type img#.gif and Movie Convert resets the output format to gif. In the fields labeled Start and Increment by, choose the numbering scheme you want Movie Convert to use.
By default, Movie Convert starts numbering files with 0 and adds 1 for each new file.
Press the Start button when you're ready to convert the images to the new size.
Movie Convert lets you change the format of movie files. It does not convert the accompanying soundtrack, however. If your movie file contains a soundtrack, it is lost when you convert the file. If you have an SGI movie file, you can also use Movie Master to change it to a different file format and preserve the soundtrack. To open this tool, click the words Movie Master now.
To change formats using Movie Convert:
If Movie Convert isn't already running, open it now by clicking the words Movie Convert .
The Movie Convert window appears. In the upper left corner, you see a drop pocket and a pathname field. See Figure 3-4.
Specify the name of the movie file you want to convert.
Type the name of the movie file in the pathname field, then press <Enter>.
Or, find the file icon and place it in the drop pocket.
Now the pathname field displays the full name of the movie. For example, if you're going to convert a movie named beast.mv in the /usr/tmp directory, the pathname field would show /usr/tmp/beast.mv.
Specify the range of frames that you want to convert.
By default, Movie Convert will convert all of the frames in a movie. To specify a range of frames, enter numbers in the Start, End, and Step fields.
For example, to create a movie that contains frames 1 through 50, type 1 in the Start field, 50 in the End field, and 1 in the Step field. To create a movie that contains every other frame, up to frame 200, type 1 in the Start field, 200 in the End field, and 2 in the Step field.
Make sure Movies is selected as the output media.
The right side of the window shows all of the output options. At the top, you see controls that let you choose whether you want to end up with image files or a movie file. Click Movie. A blue triangle indicates it is selected.
Choose a file format and compression scheme from the menu button labeled Compression.
The top two choices, Apple Animation and Apple Video, produce QuickTime movie files. The lower six choices provide compression schemes for SGI movie files.
Specify the directory and file name for the movie you're creating.
In the lower right portion of the window, you see a Directory field and a File template field.
In the Directory field, type the name of the directory in which you want the converted movie to be stored.
In the File template field, type the name of the file.
Enter the frame rate at which you'd like the movie to play.
Typically, people choose a number between 1 and 30. By default, Movie Convert chooses 12.
Press the Start button to convert the movie.
If you have a directory that contains a group of numbered images, all of the same file format, you can use Movie Convert to collapse the collection of images into a movie file. Alternately, if all your image are SGI image files, you can use Movie Maker. To to open Movie Maker, click the words Movie Maker now.
To create a movie file using Movie Convert:
If Movie Convert isn't already running, open it now by clicking the words Movie Convert .
The Movie Convert window appears. In the upper left corner, you see a drop pocket and a pathname field. See Figure 3-5.
Specify the name of the directory that contains the numbered images you want to convert.
Type the name of the directory in the pathname field, then press <Enter>.
Or, find the folder icon for that directory and place it in the drop pocket.
Now the pathname field displays the directory name.
Click Numbered images to signal that you are working with a collection of images.
A blue triangle indicates it's selected. In addition, a new set of controls appears in the lower left corner of the window.
Seelct the appropriate format from the scrolling list labeled “Input format.”
Movie Convert can only convert files that are in the same format. Choose the correct format from the list.
In the field labeled File template, type the name of the files you want to use in your movie.
For example, if you have files named img1.rgb through img20.rgb, type the following in the field: img#.rgb. If you have files named img000.gif through img100.gif, type: img###.gif.
Use the Start, End, and Step fields to specify which numbered images to grab.
For example, suppose you have numbered images ranging from img1.rgb to img30.rgb and you want to use the first five images. In this case, type 1 in the Start field, 5 in the end field, and 1 in the step field. If you have 30 images and want to use every other one, type 1 in the Start field, 30 in the end field, and 2 in the step field.
Make sure Movies is selected as the output media.
The right side of the window shows all of the output options. At the top, you see controls that let you choose whether you want to end up with image files or a movie file. Click Movies. A blue triangle indicates it is selected.
If the images are different sizes, click Scale to size, select an Aspect ratio setting, then type measurements in the Width and Height fields.
If you leave the images at Original size, you'll encounter problems. The second and all subsequent frames in the movie will be badly distorted.
Choose a file format and compression scheme from the menu button labeled Compression.
The top two choices, Apple Animation and Apple Video, produce QuickTime movie files. The lower six choices provide compression schemes for SGI movie files.
Specify the directory and file name for the movie you're creating.
In the lower right portion of the window, you see a Directory field and a File template field.
In the Directory field, type the name of the directory in which you want the movie to be stored.
In the File name field, type the name of the file. By default, the name movie.mv appears.
Enter the frame rate at which you'd like the movie to play.
Typically, people choose a number between 1 and 30. By default, Movie Convert chooses 12.
Press the Start button to convert the numbered images into a movie.
Movie Convert lets you transform a movie file into a collection of image files. If you have an SGI movie file, and you want to produce images in the SGI image file format, you can also use Movie Maker. To start this tool, click the words Movie Maker now.
To convert a movie into images using Movie Convert:
If Movie Convert isn't already running, open it now by clicking the words Movie Convert .
The Movie Convert window appears. In the upper left corner, you see a drop pocket and a pathname field. See Figure 3-6.
Specify the name of the movie file you want to convert.
Type the name of the movie file in the pathname field, then press <Enter>.
Or, find the file icon and place it in the drop pocket.
Now the pathname field displays the full name of the movie. For example, if you're going to convert a movie named beast.mv in the /usr/tmp directory, the pathname field would show /usr/tmp/beast.mv.
Specify the range of frames that you want to save as image files.
By default, Movie Convert will convert all of the frames in a movie. To specify a range of frames, click All to disable the default setting, then enter numbers in the Start, End, and Step fields.
For example, to create image files for frames 1 through 50, type 1 in the Start field, 50 in the End field, and 1 in the Step field. To create image files for every other frame, up to frame 200, type 1 in the Start field, 200 in the End field, and 2 in the Step field.
Make sure Images is selected as the output media.
The right side of the window shows all of the output options. At the top, you see controls that let you choose whether you want to end up with image files or a movie file. Click Images. A blue triangle indicates it is selected.
Click on a format in the scrolling list labeled “Output format.”
This determines how the file will be converted. The item is highlighted black when it's selected. See “An Explanation of Input and Output Formats” for a description of each abbreviation on the list.
Specify the directory and file name for the images you're creating.
In the lower right portion of the window, you see a Directory field and a File template field.
In the Directory field, type the name of the directory in which you want the converted images to be stored.
In the File template field, type the template you want Movie Convert to use when naming these images.
By default, the field displays newimage. You must add a # sign to this name or you will end up with one file named newimage. For example, type newimage# if you want the images to be named newimg0, newimg1, newimg2, etc....
Note: Movie Convert uses the filename suffix to determine the output format. If you type img#.gif, Movie Convert automatically resets the output format to gif. In the fields labeled “Start” and “Increment by,” choose the numbering scheme you want Movie Convert to use.
By default, Movie Convert starts numbering files with 0 and adds 1 for each new file.
Click the Start button to convert the movie into a series of numbered image files.
The drop pocket is a place for you to put icons of the image or movie files you want to convert. Place a folder icon in the drop pocket if you want to convert a series of numbered image files, all stored in that directory.
The pathname field is a place for you to specify the name of the file you want to convert. By default, it displays the pathname of your home directory. If you place an icon in the drop pocket, the pathname field automatically updates and shows the pathname for that icon.
The Recycle button provides a list of files and directories whose names have appeared in the pathname field. Place the cursor over the button, then press the left mouse button to see the list.
The Input Type controls let you specify what you want to convert—a single image file or a group of numbered images.Click Numbered images if you've used the drop pocket or pathname field to specify the name of a directory that contains numbered images (img1.rgb, img2.rgb, img3.rgb, for example).
The list contains the name of all the image file formats that Movie Convert accepts. By default, when you specify a single image file name, Movie Convert highlights the correct format. If Movie Convert can't determine the file type, or you specify a directory that contains multiple image files, you need to select the input format.
See also “An Explanation of Input and Output Formats.” It provides a brief description of each abbreviation on the list.
These controls appears when you enter the name of a movie file in the pathname field. They determine which frames of the movie to convert. By default, Movie Convert converts all frames in a movie. To specify a range of frames, click All. When the checkmark disappears, you can enter numbers in the Start, End, and Step fields. The Step field determines which frames in the sequence to use—every frame in the sequence, every other frame, or every third frame, for example.
This field appears if you're working with a series of numbered images. It displays the name of the directory that contains the image files. You cannot edit this field; Movie Convert pulls this information from the pathname field at the top of the window.
This field appears if you're working with a series of numbered images. Use it to specify the names of the files you want to convert. Most importantly, use this to specify where the numeral appears in the file name. For example, if the directory contains files named img1.rgb, img2.rgb, and img3.rgb, you type: img#.rgb.
This field appears if you're converting a sequence of numbered images. Type the number of the image that you want to use as the starting point for the sequence. For example, if you have image files ranging from img1.rgb to img20.rgb, and you want to start with img2.rgb, type 2 in the Start field.
This field appears if you're converting a sequence of numbered images. Type the number of the image that you want to mark the end of the sequence. For example, if you have image files ranging from img1.rgb to img20.rgb, and you want to end with img15.rgb, type 15 in the End field.
This field appears if you're converting a sequence of numbered images. Use it to specify which images in the sequence you want to convert—every one, every other one, or every third one, for example.
The Output Type controls let you choose whether you want to create image files or movie files. For example, if you want to change the file format of an image, click Images. If you want to convert a collection of images into a movie file, click Movies.
The Resize controls let you change the size of image files and frames within a movie file. By default, Movie Convert maintains the original image size. Click Scale to size to shrink or enlarge the entire image. Click Crop/poster to size to cut the image to a specified size or enlarge the image by surrounding it with black. Click Same as original to preserve the original size. When you crop an image, you don't interactively select the area you want to crop. Movie Convert uses the center of the image as the basis for the crop measurements.
| Note: If you're consolidating a series of different-sized images into a movie, you'll notice that Movie Convert makes all images the size of the first input file. In doing so, it distorts the second and all subsequent frames in the movie. If you choose another resize option, Movie Maker converts all the images to the specified size. See also “Resizing Images Using Movie Convert.” |
By default, Movie Convert preserves the aspect ratio of the original image. You can choose to enforce an aspect ratio of four to three, which is the aspect ratio of NTSC video. Or, click Free if you want to choose a particular size, regardless of aspect ratio.
By default, Movie Convert shows the size of the original image, in pixels, in the Width and Height fields. Enter different numbers in these fields if you want to enlarge, shrink, or crop the image.
| Note: If you've opted to preserve the original ratio or a four-to-three ratio, you'll notice that changing the value in one field automatically causes the other field to update. |
The Compression menu button lets you convert a movie file from one format to another. The top two menu items—Apple Animation and Apple Video—create QuickTime movie files. Apple Animation is best suited for sequences of images or other computer-generated content; Apple Video is best suited for sequenced video data.
The remaining menu items create Silicon Graphics movie files. MVC1, MVC2, RLE, and RLE24 provide various forms of compression.
Use the Directory field to specify the name of the directory in which you want to store the new files. By default, this field displays the name of the directory from which you ran Movie Convert.
Use the File Template field to specify the name of the file you're creating. By default, this field displays newimage. If you're converting a series of numbered images, add a # to the file name. The # is replaced with a number. For example, if you type newimage#, you'll end up with files named newimage0, newimage1, newimage2, etc...
If you're creating a movie file, the label changes to “File Name” and the default name changes to movie.mv.
Specify how quickly you want the movie to play in the Frame Rate field. Typically, people choose a number between 1 and 30. By default, Movie Convert chooses 12, resulting in movies that display 12 frames per second.
This list contains the name of all the image file formats that Movie Convert produces. Select an item from this list when you're changing the format of images.
See also “An Explanation of Input and Output Formats.” It provides a brief description of each abbreviation on the list.
The Start field works in conjunction with the File Template field. The number you enter in this field determines how the file names are numbered. For example, if the File Template field contains newimage# and the Start field contains 5, you end up with files named newimage5, newimage6, etc...
The Increment by field works in conjunction with the File Template and Start fields. The number you enter in this field determines how the file names are numbered. For example, if the File Template field contains newimage#, the Start field contains 5, and the Increment by field contains 2, you end up with files named newimage5, newimage7, newimage9, etc...
Movie Convert only has two menu commands: “Open” and “Exit.” The keyboard shortcuts are:
| “Open” | <Ctrl>-o and <Alt>-f; o | |
| “Exit” | <Ctrl>-q and <Alt>-f; x |
This section provides a list of all the input and output formats Movie Convert accepts.
| bmp | Microsoft® Windows BitMaP file | |
| cur | Microsoft Windows CURsor file | |
| eps | Encapsulated PostScript (write-only) | |
| gif | CompuServe Graphics Image Format File | |
| hdf | Hierarchical Data Format File | |
| ico | Microsoft Windows ICOn file | |
| icon | Sun™ Icon and Cursor file | |
| mpnt | Apple Macintosh MacPaint file | |
| pbm | Portable Bit Map file | |
| pgm | Portable Grayscale Map file | |
| pic | PIXAR PICture file | |
| pict | Apple Macintosh QuickDraw/PICT file | |
| pict | SoftImage PICT file (read-only) | |
| pix | Alias PIXel image file | |
| pnm | Portable aNy Map file | |
| ppm | Portable Pixel Map file | |
| ps | PostScript (write-only) | |
| ras | Sun RASterfile | |
| rgb | SGI RGB image file | |
| rgba | 4 component SGI image file | |
| rgbA | 4 component SGI image file with generated alpha | |
| rla | Wavefront™ raster image file | |
| rle | Utah Runlength-encoded image file | |
| rpbm | Raw Portable Bit Map file | |
| rpgm | Raw Portable Grayscale Map file | |
| rpnm | Raw Portable aNy Map file | |
| rppm | Raw Portable Pixel Map file | |
| synu | Synu image file | |
| tga | Truevision Targa image file | |
| tiff | agged Image File | |
| viff | Khoros Visualization Image File Format | |
| x | Stardent AVS X image file | |
| xbm | X11 Bit Map file | |
| xwd | X Window Dump image file |
This section lists some of the problems you might encounter while using Movie Convert and provides suggested workarounds for them.
You typed a new file or directory name in the pathname field but the drop pocket displays the wrong icon.
Press the <Enter> key after typing a new name in the pathname field. This updates the drop pocket.
You expected Movie Convert to identify the input format of the image.
Press the <Enter> key after typing a new name in the pathname field. If the filename has a suffix that identifies its type, Movie Convert selects that format from the scrolling list. If the filename doesn't identify the image format, you need to select an item in the list.
You expect to create multiple image files but you end up with one image file instead.
Look in the field labeled “File Template.” By default, this field contains the name newimage. If you input several image files, and don't change the name, you end up with one file named newimage.To create multiple image files, you must include a # sign in the name. For example, you could enter the name newimage#. The # sign is replaced with a number during the conversion.
Movie Convert says it's going to convert more images than you expect it to convert.
Movie Convert looks at the Start, Stop, and Step fields to determine how many images you're going to convert. For example, if you start with 1, end with 30, and have a step count of 1, Movie Convert thinks you're going to convert 30 images. It does not check to see if you actually have 30 files that match the file name template you specified.
Your movie file lost its soundtrack.
Movie Convert discards the soundtrack when it converts a movie file from one format to another. If your movie is an SGI movie file, consider using Movie Master to convert the file to a different format. It preserves the soundtrack.
In the movie file you created, the second and all subsequent frames in the movie are badly distorted.
Perhaps you composed your movie out of different-sized images. Try making the movie again. This time, click the Scale to size button, then specify a width and height. All of the images are resized accordingly and combined in a movie file.
You see the error message “Unrecognized file type. Please select a different format from the scrolling list of input formats.”
Movie Convert cannot determine the input format of all file types. If you see this message, you need to select a format from the list. If you've already selected a format, try selecting a different format. The one you chose initially was inaccurate.
You see the error message “Please select an output format from the scrolling list.”
You did not choose an output format for the image files you're creating. Select an output format from the list, then try converting the file again.
You see the error message “Please specify an input file name.”
You forgot to specify the name of the file you want to convert. Perhaps you specified a directory name but forgot to include the file name.
You see the error message “You don't have permission to create files in the specified output directory.”
You do not have permission to place files in the directory you specified. Specify a different directory, then try converting the file again. To evaluate the permission settings for that directory, use basic desktop capabilities. Select the folder icon, then choose “Permissions” from the Selected menu.