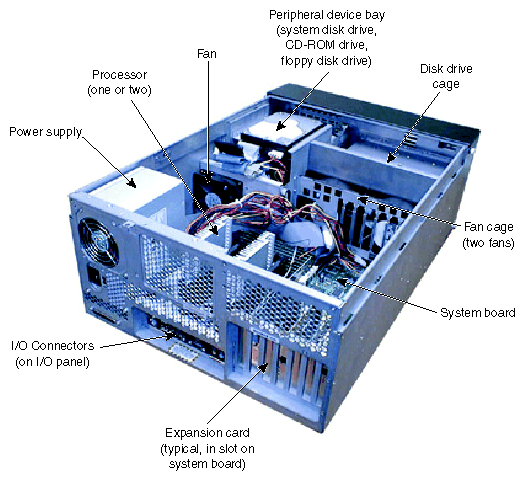
This chapter describes how to gain access to major internal components so you can upgrade and service your system.
 | Warning: This is a user-serviceable system. Service and upgrade tasks should be performed by users who can follow instructions in a manual to service equipment, and can do so without harm to themselves or damage to the equipment. |
| Warning: The system is always on when connected to AC power. Before opening the system, disconnect the system's power cord from its AC power outlet. |
| Warning: Internal components may be at high temperatures. Allow time for them to cool before handling them. |
| Warning: Internal components can be damaged by static electricity. Use an antistatic wrist strap connected to the bare metal of the system's chassis to protect against electrostatic discharge. |
 | Note: “Right side” and “left side” are as seen from the front of the system. |
Sensitive components inside the base unit can be damaged by static electricity. To protect against electrostatic discharge, take the following precautions:
Disconnect the base unit from AC power before opening the base unit.
Touch the bare metal of the base unit chassis before touching any internal components.
Handle all printed circuit boards as little as possible and only by the edges. Do not touch any gold contacts on a circuit board.
Leave new parts in their protective packaging until you install them.
Use a disposable or reusable antistatic wrist strap when servicing or upgrading the system. Once you use a disposable wrist strap, you cannot use it again.
Attach an antistatic wrist strap to any bare metal part of the base unit chassis. The metal conductor in the elastic sleeve of a reusable antistatic strap must contact bare skin.
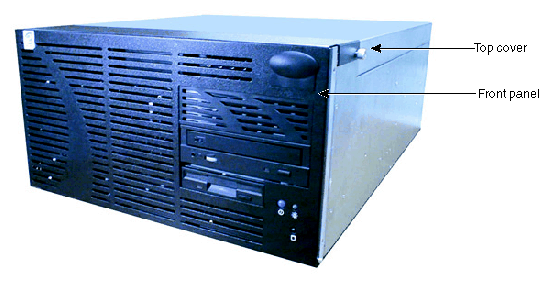
The following figures show the access points for major internal components.
| Warning: The system is always on when connected to AC power. Before opening the system, disconnect the system's power cord from its AC power outlet. |
| Warning: Close the base unit before operating the system. This ensures proper airflow for cooling and reduces electromagnetic interference (EMI) emissions. |
 | Caution: Ensure the stabilizers for the rack in which the system is mounted are fully extended. |
To open the base unit:
Remove the screws that secure the handle brackets to the equipment rack mounting rails.
Disconnect all cables from the back of the base unit.
Slide the base unit out of the equipment rack until it locks in the extended position.
At the back of the base unit, remove the screws that secure the top cover to the base unit.
Slide the top cover back and lift it off.
To close the base unit:
Replace the top cover.
Secure the top cover to the base unit with the screws removed previously.
Slide the base unit into the equipment rack.
Secure the base unit handle brackets to the equipment rack mounting rails with the screws removed previously.
Reconnect all cables to the back of the base unit.
| Warning: The system is always on when connected to AC power. Before removing the front panel, disconnect the system's power cord from its AC power outlet. |
| Warning: Close the front panel before operating the system. This ensures proper airflow for cooling. |
Disconnect all cables from the back of the base unit.
Remove the screws that secure the handle brackets to the equipment rack mounting rails.
Slide the base unit out of the equipment rack until it locks in the extended position.
Remove the screws securing the handle brackets to the base unit and remove the handle brackets.
Loosen the two thumbscrews that secure the front panel to the base unit.
Swing the panel down on its hinges.
To close the front panel:
Lift the front panel upward and push it onto the base unit.
Secure the panel to the base unit by tightening the two front panel thumbscrews.
Replace the handle brackets on the base unit with the screws removed previously.
Slide the base unit into the equipment rack until it locks in the retracted position.
Secure the handle brackets to the equipment rack mounting rails with the screws removed previously.
Reconnect all cables to the back of the system.